
This post contains affiliate links. This means I will make a commission at no extra cost to you should you click through and make a purchase [ “As an Amazon Associate, I earn from qualifying purchases.” ]. Read the full disclosure here.
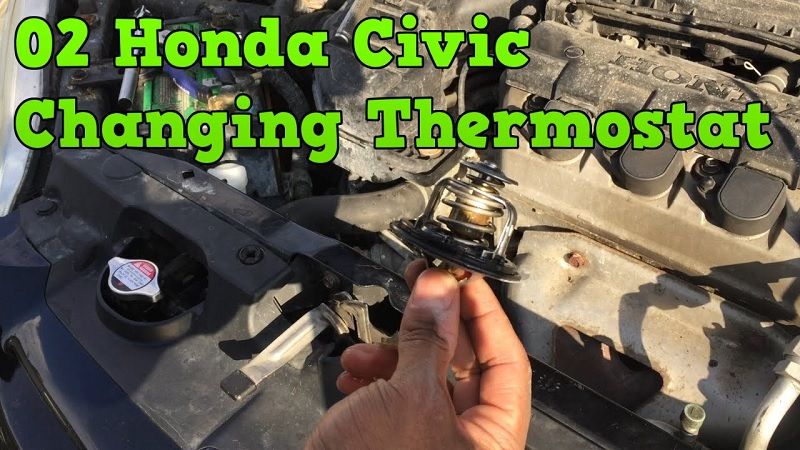
Honda Civic Thermostat GuideMechanic.Com When it comes to the performance and efficiency of your Honda Civic, the thermostat plays a crucial role.
It is responsible for regulating the engine temperature and ensuring optimal functioning. In this comprehensive guide, we will delve into everything you need to know about the Honda Civic thermostat, from its functions and signs of a faulty thermostat to the step-by-step process of replacing it.
So, whether you are a DIY enthusiast or simply want to understand more about your vehicle’s cooling system, this article is for you.
Honda Civic Thermostat
What is a Thermostat and How Does it Work?
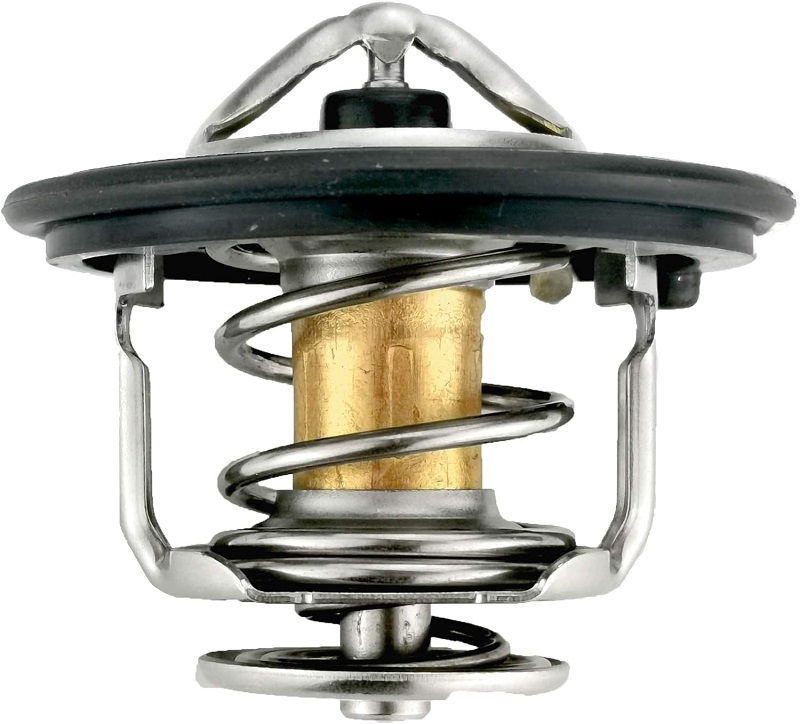
The thermostat in your Honda Civic is a small but essential component that helps regulate the engine temperature.
Its primary function is to maintain the engine at an optimal operating temperature, typically around 195 degrees Fahrenheit.
By doing so, it ensures that the engine runs efficiently and reduces the risk of overheating or freezing, which can lead to severe engine damage.
See Also: 2006 Honda Civic Catalytic Converter
Inside the thermostat, there is a wax pellet or a bimetallic coil that expands or contracts based on the coolant temperature.
When the engine is cold, the thermostat remains closed, preventing the coolant from flowing to the radiator and instead circulating within the engine to warm it up quickly.
As the engine reaches its operating temperature, the thermostat opens, allowing the coolant to flow through the radiator, where it gets cooled before returning to the engine.
By controlling the flow of coolant, the thermostat helps maintain a consistent engine temperature, regardless of external conditions.
This allows the engine to operate efficiently and optimizes fuel combustion, reducing emissions and improving overall performance.
Signs of a Faulty Thermostat
Recognizing the signs of a faulty thermostat is crucial to prevent potential engine damage and costly repairs. Here are some common symptoms that may indicate a problem with your Honda Civic thermostat:
1. Overheating
If your engine temperature gauge consistently reads in the red zone or you notice steam coming from under the hood, it could be a sign of a malfunctioning thermostat. An overheating engine should not be ignored, as it can lead to severe damage and even engine failure.
2. Fluctuating Temperature Gauge
If you notice that the temperature gauge on your dashboard fluctuates between hot and cold, it could indicate a faulty thermostat. The thermostat may be stuck in the open or closed position, causing the engine temperature to vary unpredictably.
3. Poor Heater Performance
A malfunctioning thermostat can also affect the performance of your vehicle’s heater. If you notice that the heater does not produce hot air, or the temperature does not remain consistent, it could be a sign of a faulty thermostat.
4. Coolant Leaks
Leaking coolant is often an indication of a problem within the cooling system. While it may not always be directly related to the thermostat, coolant leaks can cause the engine to overheat, leading to potential thermostat issues.
5. Engine Misfires
In some cases, a faulty thermostat can cause engine misfires or rough idling. This occurs when the engine temperature fluctuates excessively, affecting the combustion process and overall engine performance.
6. Reduced Fuel Efficiency
If you notice a significant decrease in your Honda Civic’s fuel efficiency, it could be attributed to a malfunctioning thermostat. When the engine operates at an incorrect temperature, it can negatively impact fuel combustion and lead to increased fuel consumption.
See Also: 2005 Honda Civic Catalytic Converter
It is important to note that while these symptoms may indicate a faulty thermostat, they can also be caused by other issues within the cooling system. Proper diagnosis is essential to accurately identify the problem and determine the appropriate course of action.
Diagnostic Process
When faced with thermostat-related issues, it is essential to diagnose the problem accurately before proceeding with repairs. Here is a step-by-step diagnostic process to help you identify a faulty thermostat:
1. Check Coolant Levels
Begin by checking the coolant levels in the radiator and coolant reservoir. Low coolant levels can lead to overheating and potentially mask underlying thermostat issues. Ensure that the coolant level is within the recommended range and top it up if necessary.
2. Inspect the Thermostat Housing
Next, visually inspect the thermostat housing for any signs of leaks, cracks, or corrosion. A damaged housing can affect the proper functioning of the thermostat and may require replacement. If you notice any issues, it is advisable to consult a professional for further inspection.
3. Use a Thermometer
If the above steps do not reveal any obvious issues, you can use a thermometer to verify the accuracy of the engine temperature. Start the engine and let it warm up to operating temperature. Carefully touch the upper radiator hose to check for heat.

Then, use an infrared thermometer to measure the temperature of the radiator hose and compare it to the thermostat opening temperature, typically around 195 degrees Fahrenheit. If there is a significant difference, it may indicate a faulty thermostat.
4. Consult a Professional
If you are unsure or unable to diagnose the problem yourself, it is best to consult a professional mechanic.
See Also: Honda Element Catalytic Converter
They have the expertise and specialized tools to accurately diagnose thermostat issues and recommend the appropriate course of action.
Tools and Materials Needed
Before you embark on replacing your Honda Civic thermostat, it is crucial to gather the necessary tools and materials. Here is a comprehensive list of items you will need:
1. Replacement Thermostat
Ensure you have the correct replacement thermostat for your Honda Civic model. Consult your vehicle’s manual or a trusted automotive parts store to find the appropriate thermostat.
2. Coolant
You will need coolant to refill the system after replacing the thermostat. Make sure you have the right type and quantity of coolant recommended for your Honda Civic model.
3. Socket Set
A socket set with various sizes will be necessary to remove and install bolts and fasteners during the thermostat replacement process.
4. Pliers
A pair of pliers may come in handy for removing hose clamps or other components during the replacement process.
5. Screwdriver
A screwdriver, both flathead and Phillips-head, will be needed for removing screws or other fasteners.
6. Drain Pan
A drain pan is necessary to catch and contain the coolant when draining it from the system.
7. Funnel
A funnel will make it easier to refill the cooling system with coolant without spills or overflow.
8. Gasket or Sealant
Depending on your thermostat and vehicle model, you may need a gasket or sealant for proper installation. Check the instructions provided with your replacement thermostat.
9. Rag or Shop Towel
Having a rag or shop towel nearby will help you clean any spills or coolant residue.
Ensure that you have all the necessary tools and materials before beginning the thermostat replacement process. This will help you save time and ensure a smooth and efficient repair.
Step-by-Step Thermostat Replacement Process
Replacing the thermostat in your Honda Civic can be done with careful attention to detail and following these step-by-step instructions:
1. Prepare the Vehicle
Make sure the engine is cool before starting any work. Park the vehicle on a level surface and engage the parking brake. Open the hood and locate the radiator and thermostat housing.
2. Drain the Coolant
Place a drain pan underneath the radiator drain plug to catch the coolant. Use a socket or wrench to remove the drain plug and allow the coolant to drain completely. Dispose of the coolant properly according to local regulations.
3. Remove Necessary Components
Depending on your Honda Civic model, you may need to remove any components obstructing access to the thermostat housing. This could include air intake ducts, engine covers, or other components. Refer to your vehicle’s manual for specific instructions.
4. Disconnect Hoses and Wiring
Before removing the thermostat housing, disconnect any hoses or wiring connected to it. Use pliers to loosen hose clamps and carefully remove the hoses. Take note of their positions for proper reinstallation.
5. Remove the Thermostat Housing
Using a socket or wrench, remove the bolts or fasteners securing the thermostat housing in place. Carefully detach the housing from the engine and set it aside. Take note of the thermostat’s orientation for proper installation of the replacement.
6. Remove the Old Thermostat
Inspect the old thermostat for any signs of damage or wear. Carefully remove it from the housing, taking note of its position and orientation. If necessary, clean the housing and surrounding area to ensure a proper seal for the replacement thermostat.
7. Install the New Thermostat
Place the new thermostat in the housing, ensuring it is oriented correctly accordingto the manufacturer’s instructions. Apply a small amount of gasket sealant, if required, to create a proper seal.
See Also: Honda Fit Catalytic Converter
Carefully position the thermostat housing over the thermostat and secure it in place with the bolts or fasteners. Make sure not to overtighten the bolts, as this can damage the housing or cause leaks.
8. Reconnect Hoses and Wiring
Reattach any hoses or wiring that were disconnected earlier, ensuring they are properly secured with hose clamps or connectors. Double-check that all connections are tight and secure to prevent any coolant leaks.
9. Refill the Cooling System
Using a funnel, slowly pour the appropriate coolant into the radiator until it reaches the recommended level. Refer to your vehicle’s manual for the correct coolant type and the proper filling procedure. It is crucial to use the correct coolant and avoid mixing different coolant types, as this can cause damage to the cooling system.
10. Bleed the Cooling System
To remove any air pockets in the cooling system, start the engine and let it run for a few minutes. Keep an eye on the coolant level and add more if necessary. Carefully monitor the temperature gauge to ensure it remains within the normal operating range.
11. Check for Leaks
Once the engine has reached its operating temperature, visually inspect the area around the thermostat housing and radiator for any signs of coolant leaks. If you notice any leaks, promptly address them to prevent further issues.
12. Reassemble Components
If you had to remove any components to access the thermostat housing, now is the time to reattach them. Make sure all bolts and fasteners are tightened securely.
13. Dispose of Coolant Properly
Dispose of the old coolant according to local regulations. Coolant is toxic and harmful to the environment, so it is essential to follow proper disposal procedures. Many automotive stores or recycling centers accept used coolant for safe disposal.
By following these step-by-step instructions, you can successfully replace the thermostat in your Honda Civic. However, if you are uncertain or uncomfortable performing this task, it is always best to seek the assistance of a professional mechanic.
Tips and Precautions
Replacing a thermostat requires attention to detail and adherence to certain precautions to ensure a successful outcome. Here are some helpful tips and precautions to keep in mind:
1. Use the Recommended Coolant
Using the recommended coolant type for your Honda Civic is crucial for maintaining the proper functioning of the cooling system. Different vehicles may require different coolant types, so refer to your vehicle’s manual or consult a trusted automotive professional.
2. Avoid Mixing Coolants
Never mix different types of coolant, as this can cause chemical reactions that lead to coolant breakdown or damage to the cooling system. Stick to a single type of coolant specified for your vehicle.
3. Handle Coolant with Care
Coolant is toxic and can cause harm if ingested or in contact with the skin or eyes. Always wear protective gloves and safety goggles when handling coolant. If any contact or ingestion occurs, seek medical attention immediately.
4. Take Note of Hose Positions
When removing hoses during the thermostat replacement process, take note of their positions for proper reinstallation. Mixing up hose connections can disrupt coolant flow, leading to engine overheating or other issues.
5. Follow Torque Specifications
When tightening bolts or fasteners, make sure to follow the manufacturer’s torque specifications. Overtightening can damage components or cause leaks, while undertightening can lead to loose connections and coolant leakage.
6. Allow the Engine to Cool Down
Always allow the engine to cool down before working on the cooling system. Hot coolant and components can cause burns or other injuries. It is recommended to wait at least 30 minutes after turning off the engine before beginning any work.
7. Consult a Professional if Uncertain
If you are unsure about any step of the thermostat replacement process or lack the necessary tools and experience, it is best to consult a professional mechanic.
See Also: 2000 Honda Civic Catalytic Converter
They have the knowledge and expertise to perform the task accurately and can ensure the proper functioning of your vehicle’s cooling system.
By following these tips and precautions, you can ensure a smooth and successful thermostat replacement process in your Honda Civic.
Maintenance and Preventive Measures
Proper maintenance and preventive measures can help extend the lifespan of your Honda Civic thermostat and ensure optimal performance. Here are some essential practices to keep in mind:
1. Regular Coolant Checks
Regularly check the coolant levels in the radiator and coolant reservoir. Low coolant levels can lead to overheating and potential thermostat issues. If the coolant level is consistently low, it may indicate a leak within the cooling system that requires immediate attention.
2. Coolant Flush and Replacement
Over time, coolant can break down and become less effective in maintaining the proper operating temperature of the engine. It is recommended to flush and replace the coolant according to the manufacturer’s recommended intervals. This helps remove any contaminants and ensures the coolant’s efficiency.
3. Proper Cleaning
Regularly clean the thermostat housing and surrounding area to prevent debris or dirt from affecting the thermostat’s proper functioning. Use a soft brush or cloth to remove any buildup and ensure a clean surface for the thermostat.
4. Avoid Overheating
Prevent engine overheating by avoiding prolonged idling or driving in high-temperature conditions. Excessive heat can put a strain on the thermostat and cooling system, leading to potential issues. If you notice the engine temperature rising, take immediate action and address the cause of the overheating.
5. Inspect for Leaks
Regularly inspect the thermostat housing, radiator, and hoses for any signs of coolant leaks. Coolant leaks can lead to a loss of coolant, resulting in engine overheating and potential thermostat problems. If you notice any leaks, have them repaired promptly to prevent further damage.
6. Address Cooling System Issues Promptly
If you notice any abnormalities in the cooling system, such as fluctuating temperature gauges or poor heater performance, address them promptly. Ignoring these issues can lead to more extensive damage and costly repairs. Consult a professional mechanic for proper diagnosis and resolution.
7. Follow Manufacturer’s Maintenance Schedule
Refer to your vehicle’s manual for the manufacturer’s recommended maintenance schedule. Following the recommended service intervals ensures that your Honda Civic receives the necessary inspections and maintenance to keep the cooling system, including the thermostat, in optimal condition.
By incorporating these maintenance practices into your routine, you can prolong the lifespan of your Honda Civic thermostat and prevent potential issues from arising.
Frequently Asked Questions
Below are answers to some commonly asked questions about Honda Civic thermostats:
1. How often should I replace the thermostat in my Honda Civic?
The thermostat does not have a specific replacement interval. However, it is recommended to inspect the thermostat during routine maintenance and replace it if any signs of damage or malfunction are present. Generally, a well-maintained thermostat can last for several years.
2. Can a faulty thermostat cause my engine to overheat?
Yes, a faulty thermostat can cause engine overheating. If the thermostat gets stuck in the closed position, it restricts coolant flow and can lead to the engine overheating. It is important to address thermostat issues promptly to prevent potential damage to the engine.
3. Can I drive my Honda Civic with a faulty thermostat?
It is not recommended to drive your Honda Civic with a faulty thermostat. Operating the engine with a malfunctioning thermostat can lead to overheating, engine damage, and potential breakdown. It is best to address thermostat issues before driving the vehicle.
4. How much does it cost to replace a Honda Civic thermostat?
The cost of replacing a Honda Civic thermostat can vary depending on factors such as the model year, location, and labor rates. On average, the cost can range from $100 to $250, including parts and labor. However, it is advisable to consult a professional mechanic for an accurate estimate based on your specific vehicle.
5. Can I replace the thermostat in my Honda Civic myself?
Replacing the thermostat in your Honda Civic can be a DIY task if you have the necessary tools, knowledge, and experience. However, if you are uncertain or uncomfortable performing the task, it is best to seek the assistance of a professional mechanic to ensure the proper installation and functioning of the thermostat.
These are just a few frequently asked questions about Honda Civic thermostats. If you have any specific concerns or queries, it is recommended to consult a trusted automotive professional.
Common Misconceptions
There are often misconceptions surrounding thermostats and their role in a vehicle’s cooling system. Let’s debunk some common myths and provide accurate information:
1. Myth: The thermostat is the main cause of engine overheating.
Fact: While a faulty thermostat can contribute to engine overheating, it is not always the sole cause. Other factors, such as a malfunctioning water pump, radiator issues, or a coolant leak, can also lead to engine overheating. It is essential to diagnose the specific cause accurately before replacing the thermostat.
2. Myth: A thermostat only regulates engine temperature in cold weather.
Fact: The thermostat regulates the engine temperature regardless of weather conditions. Its purpose is to maintain a consistent operating temperature, typically around 195 degrees Fahrenheit, to ensure optimal engine performance. It prevents overheating in warm weather and aids in quick engine warm-up during cold weather.
3. Myth: The thermostat always fails in the closed position.
Fact: While a thermostat can fail in the closed position, it can also fail in the open position or partially stuck positions. A thermostat stuck in the open position can cause the engine to take longer to warm up, resulting in poor fuel efficiency and heater performance. It is crucial to diagnose the specific issue to determine the appropriate course of action.
4. Myth: A higher temperature thermostat will improve engine performance.
Fact: The temperature rating of the thermostat is designed to maintain the optimal operating temperature for the engine. Using a higher temperature thermostat than recommended can disrupt the engine’s thermal balance and negatively impact performance. It is best to adhere to the manufacturer’s specifications when selecting a thermostat.
5. Myth: Flushing the cooling system will fix thermostat issues.
Fact: Flushing the cooling system can improve overall system performance and remove debris, but it may not fix specific thermostat issues. If a thermostat is faulty or damaged, it will likely require replacement. Flushing the system is a preventive maintenance step but may not resolve underlying thermostat problems.
By debunking these common misconceptions, you can better understand the role and function of the thermostat in your Honda Civic’s cooling system.
Seeking Professional Help
While this guide aims to empower you to replace the Honda Civic thermostat yourself, there may be instances where professional assistance is necessary. Here are some situations when it is best to seek the expertise of a qualified mechanic:
1. Lack of Tools or Experience
If you do not have the necessary tools or experience to perform the thermostat replacement, it is advisable to consult a professional mechanic. They have the specialized tools and knowledge to ensure a proper installation and functioning of the thermostat.
2. Complexity of the Repair
If the thermostat replacement process in your Honda Civic involves intricate steps or requires the removal of multiple components, it may be best to leave it to a professional. They are familiar with the specific challenges and intricacies of the repair and can complete it efficiently.
3. Uncertainty in Diagnosis
If you are unsure about the specific cause of cooling system issues or suspect other underlying problems, consulting a professional mechanic is recommended. They can accurately diagnose the problem and provide a comprehensive solution that goes beyond thermostat replacement if necessary.
4. Warranty Considerations
If your Honda Civic is still under warranty, it is advisable to consult a professional mechanic authorized by the manufacturer. This ensures that the warranty remains valid and that the repair is performed according to the manufacturer’s standards.
5. Time and Convenience
If you are short on time or prefer to have the repair done quickly and efficiently, taking your Honda Civic to a professional mechanic is a convenient option. They have the expertise and resources to complete the repair promptly, allowing you to get back on the road without delay.
Ultimately, the decision to seek professional help depends on your comfort level, resources, and the specific circumstances surrounding the thermostat replacement in your Honda Civic. Consulting a trusted professional ensures that the job is done correctly and gives you peace of mind.
Conclusion
In conclusion, understanding the Honda Civic thermostat and its role in your vehicle is crucial for maintaining optimal performance and preventing costly repairs. By following the steps outlined in this comprehensive guide, you can confidently diagnose and replace a faulty thermostat yourself or make informed decisions when seeking professional help. Remember, regular maintenance and a proactive approach to addressing thermostat issues will keep your Honda Civic running smoothly for years to come.

- Used Trucks for Sale in Texas Under 5000 By Owner - June 15, 2026
- Used Trucks for Sale Near Me Under 30000 With Warranty - June 14, 2026
- Used Trucks for Sale Near Me Under 30000 Low Mileage - June 13, 2026