
This post contains affiliate links. This means I will make a commission at no extra cost to you should you click through and make a purchase [ “As an Amazon Associate, I earn from qualifying purchases.” ]. Read the full disclosure here.
Car Battery Cable Replacement: A Comprehensive Guide GuideMechanic.Com Car battery cables are vital components of a vehicle’s electrical system, responsible for transmitting electrical power from the battery to various electrical components, including the starter motor, alternator, and accessories.
Over time, battery cables can deteriorate due to corrosion, wear and tear, or damage, leading to electrical issues, starting problems, and potential safety hazards.
In this comprehensive guide, we will explore the importance of car battery cables, signs indicating the need for replacement, and the steps involved in replacing them.
See Also: How to Test a Car Battery with a Multimeter
Car Battery Cable Replacement: A Comprehensive Guide
Understanding Car Battery Cables:
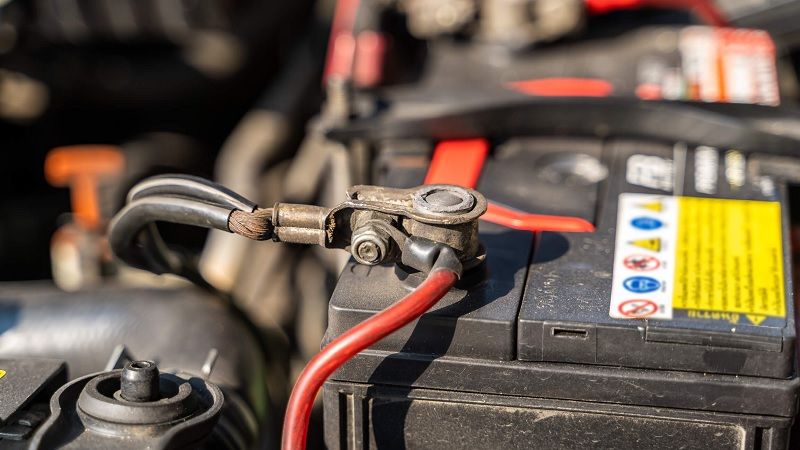
Car battery cables, also known as battery leads or terminals, consist of heavy-duty insulated wires that connect the battery to the rest of the vehicle’s electrical system.
These cables typically include a positive (red) cable connected to the battery’s positive terminal and a negative (black) cable connected to the battery’s negative terminal.
The positive cable carries electrical current from the battery to the starter motor and other electrical components, while the negative cable completes the circuit by grounding excess electrical charge.
Signs of Failing Battery Cables:
Corrosion:
Corrosion on the battery terminals or along the cables themselves is a common sign of deteriorating battery cables. Corrosion can hinder the flow of electrical current, leading to starting problems and electrical issues.
Visible Damage:
Physical damage to the battery cables, such as fraying, cuts, or exposed wires, indicates the need for replacement. Damaged cables can compromise electrical conductivity and pose a safety risk.
Starting Issues:
Difficulty starting the vehicle or intermittent starting problems may result from poor electrical connections due to worn or damaged battery cables.
Electrical Malfunctions:
Electrical malfunctions, such as flickering lights, dim headlights, or erratic electrical behavior, can occur when battery cables fail to deliver consistent electrical power to the vehicle’s electrical components.
Battery Leakage:
Leakage of battery acid around the battery terminals or onto the cables can corrode the cables and compromise their integrity, necessitating replacement.
Car Battery Cable Replacement: A Comprehensive Guide
Replacing Car Battery Cables:

Replacing car battery cables requires basic automotive knowledge and the following tools:
- New battery cables (positive and negative)
- Wrenches or sockets (usually 8mm, 10mm, or 13mm)
- Wire brush or sandpaper
- Terminal cleaning tool (optional)
- Battery terminal protector spray (optional)
- Safety gloves and eye protection
Step 1: Safety Precautions
See Also: 2014 Chevy Equinox Battery
Before replacing car battery cables, ensure the vehicle is parked on a flat surface with the engine turned off. Put on safety gloves and eye protection to protect against battery acid and electrical hazards.
Step 2: Disconnect the Battery
Using the appropriate wrench or socket, loosen and remove the negative battery cable first, followed by the positive cable. Disconnecting the negative cable first prevents accidental electrical arcing.
Step 3: Remove Old Cables
Inspect the old battery cables for signs of corrosion, damage, or wear. Loosen and remove the cable clamps or terminal connectors securing the cables to the battery terminals and electrical components. Carefully pull the old cables away from the battery and discard them.
Step 4: Clean Battery Terminals
Use a wire brush or sandpaper to clean the battery terminals and terminal connectors thoroughly. Remove any corrosion or buildup to ensure a clean and secure connection for the new battery cables.
Step 5: Install New Cables

Attach the new positive (red) battery cable to the positive terminal of the battery and secure it with the appropriate cable clamp or terminal connector. Repeat this process for the negative (black) battery cable, connecting it to the negative terminal of the battery.
Step 6: Secure Cables
Ensure the new battery cables are securely fastened to the battery terminals and electrical components. Tighten the cable clamps or terminal connectors to ensure a snug fit without over-tightening, which could damage the terminals.
Step 7: Test the Electrical System
After installing the new battery cables, turn the ignition key to the “on” position and test the vehicle’s electrical system, including lights, radio, and accessories, to ensure they function properly. Start the engine to verify that the vehicle starts smoothly without any starting issues.
Step 8: Apply Terminal Protector (Optional)
To prevent future corrosion and prolong the lifespan of the battery cables, consider applying a battery terminal protector spray to the battery terminals and terminal connectors. This protective coating helps seal out moisture and corrosive elements.
Step 9: Final Checks
Double-check all connections to ensure they are secure and free from any loose wires or components. Close the hood of the vehicle and ensure it latches securely.
Car Battery Cable Replacement: A Comprehensive Guide
Conclusion:
Car battery cables play a crucial role in the proper functioning of a vehicle’s electrical system. Recognizing the signs of failing battery cables and promptly replacing them when necessary is essential for maintaining reliable vehicle performance and electrical safety.
See Also: 2010 Chevy Malibu Battery
By following the steps outlined in this guide and exercising caution, vehicle owners can replace worn or damaged battery cables efficiently and ensure their vehicle’s electrical system operates optimally. If unsure about performing the replacement yourself, consider consulting a qualified automotive technician for assistance.

- Cheap Food Trucks for Sale Under $15K - July 3, 2025
- Used Food Trucks for Sale Under $10000 - July 3, 2025
- Landscaping Trucks for Sale - July 2, 2025