
This post contains affiliate links. This means I will make a commission at no extra cost to you should you click through and make a purchase [ “As an Amazon Associate, I earn from qualifying purchases.” ]. Read the full disclosure here.
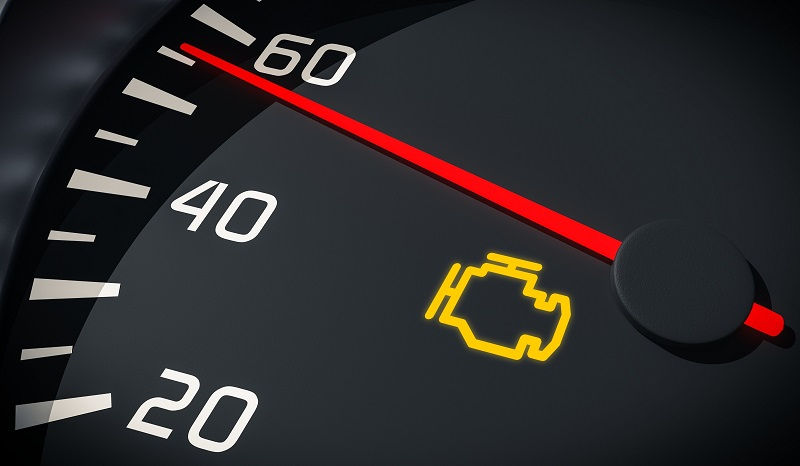
Check Engine Light Came on While Driving GuideMechanic.Com It’s a situation many drivers dread – you’re cruising down the road, enjoying your drive, when suddenly, the dreaded check engine light illuminates on your dashboard.
The check engine light can signify a wide range of issues, from minor problems to potentially severe engine damage. Understanding what to do when your check engine light comes on while driving is crucial to ensure your safety and prevent further damage to your vehicle.
In this comprehensive guide, we will walk you through the steps to take when your check engine light comes on while driving. From understanding the potential causes to discussing possible solutions, we will provide you with all the information you need to handle this situation with confidence.
Understanding the Check Engine Light
The check engine light, also known as the malfunction indicator lamp (MIL), is an important warning system in modern vehicles.
When it illuminates, it indicates that the vehicle’s onboard diagnostic system (OBD-II) has detected a problem with the engine, emissions, or other crucial components. It serves as an early warning system to prompt drivers to address potential issues before they worsen.
See Also: Autozone Check Engine Light
When the check engine light comes on, it is crucial to pay attention to any accompanying warning indicators. These indicators can provide valuable clues about the severity and nature of the problem.
For example, a steady illumination may indicate a minor issue, while a flashing or blinking light often signifies a more severe problem that requires immediate attention.
The Purpose of the Check Engine Light
The primary purpose of the check engine light is to alert drivers of potential issues that could affect vehicle performance, emissions, or safety.
It is part of the OBD-II system, which continuously monitors the vehicle’s various systems and components for irregularities or malfunctions.
When a problem is detected, the OBD-II system generates an error code, which triggers the check engine light. This code helps technicians and mechanics identify the specific issue when diagnosing and repairing the vehicle. It is essential to address the underlying problem promptly to prevent further damage and ensure optimal vehicle performance.
Types of Warning Indicators
While the check engine light itself serves as a general warning, it can be accompanied by additional warning indicators, depending on the vehicle’s make and model. These warning indicators can provide more specific information about the nature of the problem.
Some common warning indicators that may accompany the check engine light include:
- Engine temperature warning: Indicates the engine is overheating, which can lead to severe engine damage if not addressed promptly.
- Oil pressure warning: Indicates low oil pressure, which can result in engine damage if oil levels are insufficient.
- Battery warning: Indicates a problem with the vehicle’s charging system, potentially leading to a dead battery and loss of electrical power.
- Transmission warning: Indicates a problem with the transmission system, such as low fluid levels or a malfunctioning component.
It is crucial to consult your vehicle’s manual to understand the specific warning indicators associated with your make and model.
Common Causes of Check Engine Light Activation
Check out this ANCEL AD410 Enhanced OBD II Vehicle Code Reader Automotive OBD2 Scanner Auto Check Engine Light Scan Tool (Black/Yellow)

When your check engine light comes on while driving, it can be caused by a wide range of issues. Understanding the common causes can help you determine the severity of the problem and decide on the appropriate course of action. Here are some of the most common causes of check engine light activation:
Loose or Faulty Gas Cap
A loose or faulty gas cap is one of the most common reasons for the check engine light to come on. The gas cap plays a vital role in maintaining the integrity of the fuel system, preventing fuel evaporation and ensuring optimal performance. If the gas cap is not properly tightened or is faulty, it can trigger the check engine light.
To address this issue, start by checking the gas cap. Ensure it is securely tightened, and the seal is intact. If the cap appears damaged or worn, consider replacing it with a new one. After tightening or replacing the gas cap, the check engine light should turn off within a few driving cycles if this was the sole cause.
Faulty Oxygen Sensor
The oxygen sensor, also known as the O2 sensor, measures the amount of oxygen in the vehicle’s exhaust gases. It plays a crucial role in ensuring optimal fuel efficiency and reducing harmful emissions. If the oxygen sensor becomes faulty or fails, it can trigger the check engine light.
To diagnose an oxygen sensor issue, a technician will use a scan tool to retrieve the specific error code associated with the sensor. If a faulty oxygen sensor is detected, it is recommended to have it replaced by a professional to ensure proper installation and accurate readings.
Malfunctioning Mass Airflow Sensor
The mass airflow sensor (MAF) measures the amount of air entering the engine and adjusts the fuel injection accordingly. A malfunctioning MAF sensor can cause incorrect fuel-to-air ratios, leading to poor engine performance and increased emissions. This malfunction can trigger the check engine light.
If a faulty MAF sensor is suspected, it is best to consult a professional for diagnostics and potential replacement. Cleaning the MAF sensor may provide a temporary solution in some cases, but it is not always effective or recommended.
Spark Plug or Ignition Coil Issues
Spark plugs and ignition coils play a vital role in the combustion process within the engine. When these components become faulty or worn out, they can cause misfires, reduced engine performance, and increased emissions. This can trigger the check engine light.
If you suspect spark plug or ignition coil issues, it is advisable to have a professional technician inspect and replace the affected components. They will also check for any underlying causes, such as a failing ignition system or fuel delivery problems.
Exhaust Gas Recirculation (EGR) Valve Malfunction
The exhaust gas recirculation (EGR) valve recirculates a portion of the exhaust gases back into the engine’s combustion chambers to reduce emissions. When the EGR valve becomes clogged or malfunctions, it can disrupt the engine’s performance and trigger the check engine light.
If an EGR valve issue is suspected, it is crucial to have a professional diagnose and repair the problem. The EGR valve may need cleaning, replacement, or repairs, depending on the specific issue.
Other Potential Causes
In addition to the common causes mentioned above, there are numerous other issues that can trigger the check engine light, including:
- Faulty catalytic converter
- Issues with the evaporative emission control system (EVAP)
- Problems with the engine control module (ECM) or powertrain control module (PCM)
- Malfunctioning sensors, such as the coolant temperature sensor or throttle position sensor
- Wiring or electrical issues
When the check engine light comes on, it is recommended to consult a professional technician or mechanic to diagnose and address the specific cause.
See Also: Check Engine Light Scanner
Is it Safe to Drive with the Check Engine Light On?
When the check engine light comes on while driving, many drivers wonder if it is safe to continue their journey or if they should pull over immediately. The answer depends on the specific circumstances and accompanying warning indicators.
Evaluating the Warning Indicators
Assessing the severity of the issue is crucial when deciding whether it is safe to drive with the check engine light on. If the check engine light is steady and there are no other warning indicators, it may indicate a minor issue that does not pose an immediate threat to safety. However, it is still important to address the problem as soon as possible to prevent further damage or potential breakdowns.
If the check engine light is flashing or blinking, it typically signifies a more severe problem that requires immediate attention. In this case, it is advisable to pull over to a safe location and turn off the engine. Continuing to drive with a flashing check engine light can potentially cause further damage to the engine or other vital components.
Assessing Vehicle Performance
Another factor to consider is the overall performance of the vehicle. If you notice any significant changes in engine performance, such as rough idling, loss of power, or unusual noises, it is recommended to pull over and seek professional assistance. Continuing to drive in such circumstances can exacerbate the problem and potentially lead to more extensive repairs.
On the other hand, if the vehicle is operating normally and there are no noticeable issues besides the illuminated check engine light, it may be safe to continue driving for a short distance or until you can reach a safe location or service center.
Consulting the Vehicle Manual
Consulting your vehicle’s manual can provide valuable insights into the recommended actions when the check engine light comes on. The manual may provide specific guidelines or precautions based on the make and model of your vehicle.
In general, it is always advisable to err on the side of caution when dealing with the check engine light. If in doubt or if the warning indicators suggest a severe problem, it is best to pull over, turn off the engine, and seek professional assistance.
Steps to Take When the Check Engine Light Comes On

When the check engine light comes on while driving, it’s essential to know what steps to take next. By following a systematic approach, you can effectively address the issue and minimize any potential damage. Here are the steps to take when your check engine light illuminates:
1. Stay Calm and Observe
First and foremost, it’s crucial to remain calm and avoid panicking when the check engine light comes on. Take a moment to observe any changes in the vehicle’s performance, such as unusual noises, vibrations, or loss of power. Make a mental note of any specific details that may help diagnose the problem later.
2. Check for Immediate Issues
While still keeping your focus on the road, perform a quick visual inspection of the vehicle for any obvious issues. Check if any fluids are leaking, if any belts or hoses are damaged or disconnected, or if there are any loose connections. These visual checks may help identify immediate problems that require immediate attention.
3. Assess the Check Engine Light Behavior
Pay attention to how the check engine light behaves after it illuminates. Is it a steady light, a flashing light, or does it come on and off intermittently? The behavior of the check engine light can provide additional clues about the severity of the issue.
4. Take Note of Warning Indicators
As mentioned earlier, the check engine light may be accompanied by other warning indicators. Take note of any additional warning lights that are illuminated, such as the battery, oil, or temperature warning lights. Understanding the combination of warning indicators can help narrow down the possible causes.
5. Safely Pull Over (If Necessary)
See Also: Golf Warning Lights Meaning
If you notice any severe changes in vehicle performance or if the check engine light is flashing, it is advisable to pull over to a safe location as soon as it is safe to do so. Continuing to drive in such circumstances can potentially cause further damage or compromise safety.
6. Use an OBD-II Scanner
Once you have safely pulled over, you can use an OBD-II scanner to retrieve the specific error code associated with the check engine light. OBD-II scanners are readily available for purchase or can be borrowed from auto parts stores. Simply plug the scanner into the vehicle’s OBD-II port, usually located underneath the dashboard, and follow the scanner’s instructions to read the error code.
7. Decode the Error Code
After retrieving the error code, use the scanner’s manual or an online resource to decode the specific code. The error code will provide valuable information about the system or component that triggered the check engine light. It can help narrow down the potential causes and guide your next steps.
8. Research the Error Code
Once you have decoded the error code, conduct some research to understand the potential causes and solutions associated with the specific code. Online forums, automotive websites, and manufacturer-specific resources can provide insights from experienced individuals who have encountered similar issues.
9. Consider Basic Troubleshooting
Based on the information gathered from decoding the error code, you may consider performing some basic troubleshooting steps if you feel comfortable doing so. For example, if the error code indicates a faulty oxygen sensor, you may attempt to clean the sensor or check for any loose connections. However, be cautious not to attempt complex repairs or modifications unless you have the necessary expertise.
10. Decide on the Next Course of Action
After gathering all the relevant information, it’s time to decide on the next course of action. Depending on the severity of the issue, your level of expertise, and the availability of resources, you may choose from the following options:
a. DIY Repairs:
If the issue is minor and within your capabilities, you may choose to perform DIY repairs. This can include replacing a faulty sensor, cleaning a component, or addressing a loose connection. However, it is important to exercise caution and consult reliable sources to ensure the repairs are done correctly.
b. Professional Repairs:
If the issue is beyond your expertise or requires specialized tools, it is advisable to seek professional assistance. A qualified technician or mechanic can accurately diagnose the problem and perform the necessary repairs. Be sure to choose a reputable service center or mechanic with experience in handling your vehicle’s make and model.
c. Monitoring the Situation:
In some cases, the check engine light may illuminate for minor issues that do not affect vehicle performance or safety. If you have ruled out any immediate concerns and the vehicle is operating normally, you may choose to monitor the situation. Keep an eye on any changes in vehicle performance or the check engine light behavior. If the issue persists or worsens, it is best to seek professional advice.
d. Plan for a Scheduled Service:
If the check engine light comes on for routine maintenance-related issues, such as a scheduled oil change or engine service, you can plan for a service appointment. Contact your trusted service center or mechanic to schedule the necessary maintenance tasks.
11. Take Preventive Measures
Once the issue has been resolved, it’s essential to take preventive measures to minimize the chances of the check engine light coming on in the future. Regular vehicle maintenance, including scheduled inspections, fluid changes, and component replacements, can help prevent potential issues and ensure optimal vehicle performance.
12. Clear the Check Engine Light (If Applicable)
After resolving the underlying problem, you may need to clear the check engine light. While some vehicles automatically reset the check engine light after a certain number of successful driving cycles, others require manual intervention. Refer to your vehicle’s manual or consult a professional to determine the correct procedure for clearing the check engine light.
13. Keep Records
Throughout the process, it is important to keep records of the error codes, repairs performed, and any other relevant information. This documentation can be valuable for future reference, warranty claims, or when selling your vehicle.
By following these steps when your check engine light comes on while driving, you can effectively address the issue and ensure the long-term health and performance of your vehicle.
DIY Troubleshooting and Basic Fixes

While some check engine light issues require professional diagnosis and repairs, there are a few troubleshooting steps and basic fixes you can try if you feel comfortable working on your vehicle.
See Also: Engine Emission Warning
These DIY methods can help resolve minor issues and potentially save you time and money. However, it is important to note that DIY repairs should only be attempted if you have the necessary knowledge and experience. If you are unsure or uncomfortable, it is best to seek professional assistance. Here are some common DIY troubleshooting steps and basic fixes:
1. Check the Gas Cap
A loose or faulty gas cap is one of the most common reasons for the check engine light to come on. Start by inspecting the gas cap for any visible damage or wear.
Ensure it is tightly secured, and the seal is intact. If the gas cap appears damaged, consider replacing it with a new one. After tightening or replacing the gas cap, the check engine light should turn off within a few driving cycles if this was the sole cause.
2. Inspect the Battery
A weak or failing battery can sometimes trigger the check engine light. Check the battery terminals for any corrosion or loose connections. If necessary, clean the terminals and tighten any loose connections. Additionally, ensure the battery is in good condition and holding a proper charge. If the battery is old or faulty, consider replacing it with a new one.
3. Check the Air Filter
A dirty or clogged air filter can affect the air-to-fuel ratio and engine performance, potentially triggering the check engine light. Locate the air filter housing, usually located near the engine, and remove the air filter. Inspect it for any dirt, debris, or damage. If the filter is dirty, clean it or replace it with a new one according to the manufacturer’s recommendations.
4. Inspect the Spark Plugs
Faulty or worn-out spark plugs can cause misfires, reduced engine performance, and trigger the check engine light. If you have the necessary tools and experience, you can inspect the spark plugs for any signs of damage or wear. If necessary, replace the spark plugs with new ones that meet your vehicle’s specifications. Be sure to gap the new spark plugs correctly before installation.
5. Check the Oxygen Sensor Connections
In some cases, the check engine light may be triggered by a loose or disconnected oxygen sensor connection. Locate the oxygen sensor(s) in your vehicle’s exhaust system and ensure the connections are secure. If any connections are loose or disconnected, reconnect them properly. Clear the check engine light and monitor the situation to see if the issue is resolved.
6. Clean the Mass Airflow Sensor (MAF)
A dirty or contaminated mass airflow sensor can cause incorrect readings and trigger the check engine light. Locate the MAF sensor, usually located between the air filter and the throttle body, and remove it carefully.
Use a specialized MAF sensor cleaner to clean the sensor following the manufacturer’s instructions. Once cleaned, reinstall the MAF sensor and clear the check engine light. Monitor the situation tosee if the issue is resolved.
7. Check for Vacuum Leaks
Vacuum leaks can disrupt the air-fuel mixture and trigger the check engine light. Inspect the vacuum hoses and connections for any signs of damage, cracks, or disconnections. If you notice any issues, replace or repair the affected hoses. Additionally, you can use a vacuum gauge to check for any fluctuations in vacuum pressure, which may indicate a leak.
8. Inspect the EGR Valve
If your vehicle is equipped with an exhaust gas recirculation (EGR) valve, a malfunctioning valve can trigger the check engine light. Locate the EGR valve and inspect it for any signs of carbon buildup or blockage.
Clean the valve using an appropriate EGR cleaner or solvent, following the manufacturer’s instructions. If the EGR valve is severely damaged or cannot be cleaned, consider replacing it with a new one.
9. Reset the Check Engine Light
Once you have addressed the underlying issue or performed the necessary maintenance, you may need to reset the check engine light. Keep in mind that simply disconnecting the battery may not always clear the light. Consult your vehicle’s manual or use an OBD-II scanner to clear the error codes and reset the check engine light properly.
10. Monitor the Situation
After performing the DIY troubleshooting and basic fixes, it is important to monitor the situation. Take note of any changes in vehicle performance, check engine light behavior, or the reappearance of any warning indicators. If the issue persists or worsens, it is advisable to seek professional assistance to diagnose and resolve the problem.
Remember, while these DIY troubleshooting steps and basic fixes can be helpful for minor issues, it is essential to know your limitations and seek professional help when needed. Attempting complex repairs without the necessary expertise can lead to further damage or safety hazards.
See Also: Exclamation Point Dash Light
Related video of What to Do When Your Check Engine Light Comes on While Driving

- Used Trucks for Sale in Texas Under 5000 No Credit Check - June 17, 2026
- Used Trucks for Sale in Texas Under 5000 With Financing - June 16, 2026
- Used Trucks for Sale in Texas Under 5000 By Owner - June 15, 2026