

This post contains affiliate links. This means I will make a commission at no extra cost to you should you click through and make a purchase [ “As an Amazon Associate, I earn from qualifying purchases.” ]. Read the full disclosure here.
Check Engine Light After Oil Change GuideMechanic.Com Oil changes are a routine part of vehicle maintenance, essential for keeping your engine running smoothly and preventing costly repairs.
However, it can be frustrating to see the check engine light illuminate just after getting an oil change. While it may seem alarming, there can be several reasons behind this occurrence, ranging from minor issues to more serious concerns.
In this comprehensive guide, we will explore the possible reasons why your check engine light may come on after an oil change, and provide you with the necessary information to understand and address the problem.
By diving into common causes and offering practical solutions, you’ll be equipped to handle this situation confidently and efficiently.
Check Engine Light After Oil Change
Loose or Damaged Oil Cap
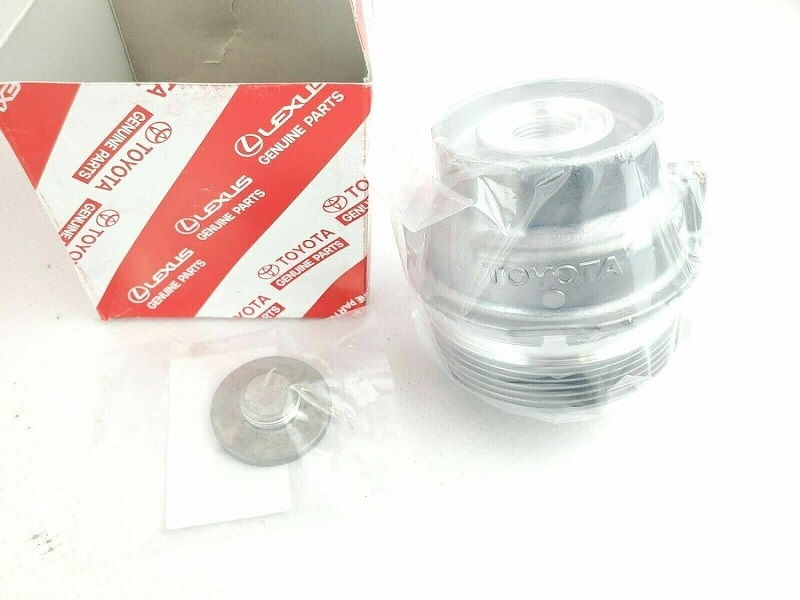
Check out this Check out this Genuine OEM Toyota New Oil Filter Housing Cap + Plug 15620-31060 15643-31050
If your check engine light comes on shortly after an oil change, one of the first things to check is the oil cap. The oil cap is responsible for sealing the oil reservoir and maintaining the proper oil pressure.
See Also: Service Engine Soon
A loose or damaged cap can cause a drop in oil pressure, triggering the check engine light. To inspect the oil cap, locate it on top of the engine and ensure it is tightly secured.
If it appears loose, tighten it by turning it clockwise until snug. If the cap is damaged or has a worn-out seal, it should be replaced. A faulty seal can result in oil leaks, which can further exacerbate the issue.
How to Inspect and Address the Issue
To inspect the oil cap, start by ensuring the engine is cool. With the engine off, locate the oil cap on top of the engine. Gently twist the cap counterclockwise to remove it.
Check the cap for any visible signs of damage, such as cracks or a worn-out seal. If you notice any issues, replace the cap with a new one specifically designed for your vehicle’s make and model.
When installing the new cap, align it with the opening and twist it clockwise until it is tightly secured. Remember not to overtighten the cap, as this can cause damage.
Once the cap is properly installed, start the engine and check if the check engine light has turned off. If it remains illuminated, move on to the next potential cause.
Oil Filter Issues
Another potential culprit for the check engine light turning on post oil change is an issue with the oil filter. The oil filter plays a crucial role in removing impurities and contaminants from the engine oil, ensuring it remains clean and functional.
If the oil filter is faulty or incorrect for your vehicle, it can restrict the flow of oil, leading to a drop in oil pressure and triggering the check engine light.
The Significance of a Faulty or Incorrect Filter
A faulty oil filter can cause various problems in your engine. One common issue is a decrease in oil pressure, which can result in poor lubrication of engine components.
Insufficient lubrication can cause excessive friction and heat, leading to premature wear and tear. Additionally, a faulty filter may not effectively remove contaminants, allowing them to circulate and potentially cause damage to sensitive engine parts.
It is crucial to use the correct oil filter recommended by your vehicle manufacturer to ensure optimal performance and avoid potential complications.
How to Address Oil Filter Issues
If you suspect an oil filter issue, the first step is to verify that the correct filter was used during the oil change. Check your vehicle’s manual or consult with a professional to determine the appropriate filter for your make and model.
If an incorrect filter was installed, it must be replaced immediately with the correct one. When replacing the filter, ensure that the old filter’s gasket is removed as well. Failing to remove the old gasket can result in a poor seal, causing oil leaks and further complications.
Once the new filter is properly installed, start the engine and monitor if the check engine light remains illuminated. If it persists, it is essential to explore other potential causes.
Oil Leaks
Oil leaks are a common problem that can occur after an oil change, and they can trigger the check engine light. Leaks can occur due to various reasons, such as a loose drain plug, damaged oil pan, or worn-out seals.
See Also: Engine Light on Car Shaking
When oil leaks, the oil level in the engine drops, leading to a decrease in oil pressure and the activation of the check engine light.
Identifying and Fixing Oil Leaks
To identify an oil leak, start by inspecting the area beneath your vehicle after it has been parked for a while. Look for any signs of oil puddles or drips.
If you notice oil stains on the ground, try to locate the source. Common areas where leaks occur include the oil pan, valve cover gasket, oil filter, or drain plug. Once you have identified the source of the leak, assess the severity.
A minor leak may only require tightening a loose component, such as the drain plug, while a more significant leak may necessitate replacing a damaged part or seal.
It is crucial to address oil leaks promptly to prevent further damage to the engine and ensure the optimal performance of your vehicle.
Check Engine Light After Oil Change
Faulty Oxygen Sensor
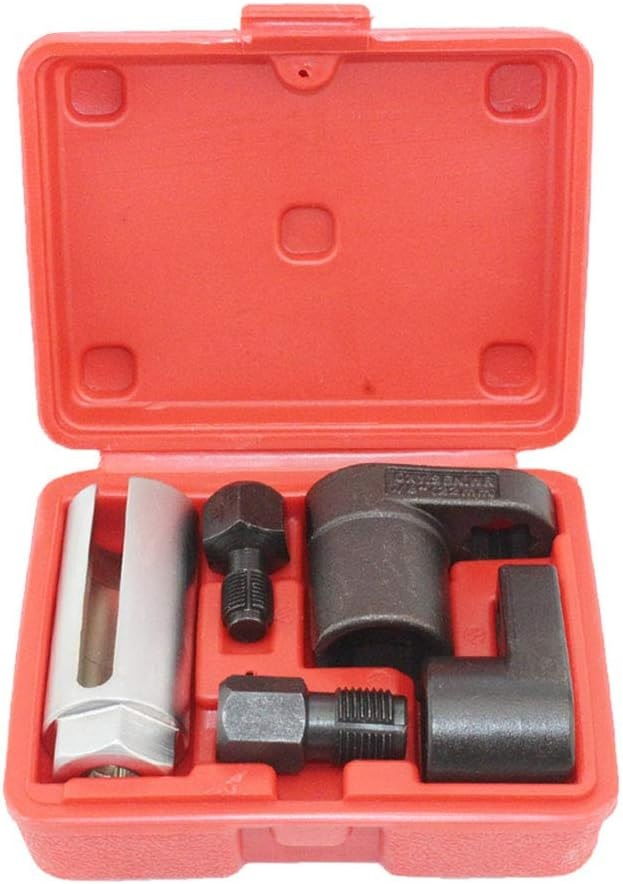
Check out this A ABIGAIL 5 PCS Automotive O2 Oxygen Sensor Socket Offset Wrench Remover Tool and Thread Chaser Tool
A malfunctioning oxygen sensor can falsely trigger the check engine light after an oil change. The oxygen sensor is responsible for measuring the level of oxygen in the exhaust gases, providing crucial feedback to the engine control unit (ECU) for efficient fuel consumption and emissions control.
If the oxygen sensor is faulty, it may send incorrect signals to the ECU, leading to an illuminated check engine light.
The Role of the Oxygen Sensor
The oxygen sensor plays a vital role in the engine’s fuel and emissions control system. It helps ensure the optimal air-fuel mixture, which is necessary for efficient combustion.
By monitoring the oxygen content in the exhaust gases, the oxygen sensor provides feedback to the ECU, allowing it to make necessary adjustments to the fuel injection and ignition timing.
This feedback loop helps optimize fuel efficiency, reduce emissions, and ensure the smooth operation of the engine.
Symptoms of a Faulty Oxygen Sensor
A faulty oxygen sensor can manifest in various ways. Common symptoms include a decrease in fuel efficiency, rough idling, engine misfires, and an increase in exhaust emissions.
If the oxygen sensor is not functioning correctly, it may provide inaccurate readings to the ECU, resulting in an imbalanced air-fuel mixture.
This imbalance can lead to poor engine performance and increased fuel consumption. Additionally, a malfunctioning oxygen sensor can cause the engine to run rich or lean, leading to rough idling and potential misfires.
If you experience any of these symptoms along with an illuminated check engine light, it is crucial to have the oxygen sensor inspected and replaced if necessary.
Steps to Resolve the Issue
If you suspect a faulty oxygen sensor, it is recommended to consult a professional mechanic who can perform a diagnostic test using specialized tools.
See Also: Vehicle Warning Symbols – Possible Causes and Troubleshooting
The diagnostic test will help identify the specific sensor causing the issue and determine if it needs replacement. Oxygen sensors are generally located in the exhaust system, either before or after the catalytic converter.
Depending on the vehicle, there may be multiple oxygen sensors present. If a faulty sensor is detected, it should be replaced with a new one that matches the specifications of your vehicle. After the replacement, the check engine light should turn off, indicating that the issue has been resolved.
It is important to note that oxygen sensors can deteriorate over time due to exposure to high temperatures and contaminants, so periodic inspection and replacement are necessary for optimal engine performance.
Vacuum Leak
A vacuum leak can disrupt the proper functioning of your engine, leading to the illumination of the check engine light.
The vacuum system plays a crucial role in various engine functions, such as controlling air intake, regulating fuel delivery, and enhancing combustion efficiency.
If there is a leak in the vacuum system, it can cause an imbalance in the air-fuel mixture, leading to engine performance issues and the activation of the check engine light.
The Causes of Vacuum Leaks
Several factors can contribute to vacuum leaks. Common causes include deteriorated or damaged vacuum hoses, loose connections, cracked intake manifold gaskets, or malfunctioning components like the PCV (Positive Crankcase Ventilation) valve.
Over time, vacuum hoses can become brittle and crack, resulting in leaks. Loose connections can occur due to improper installation or vibrations caused by engine operation. Cracked intake manifold gaskets can also allow air to enter the system, disrupting the vacuum balance.
Additionally, a faulty PCV valve can cause excessive pressure in the crankcase, leading to leaks. Identifying the specific cause of the vacuum leak is crucial for effective resolution.
The Signs of a Vacuum Leak
Several signs can indicate the presence of a vacuum leak. These include rough idling, a decrease in engine performance, hissing or whistling noises from the engine compartment, and an illuminated check engine light.
Rough idling occurs when the air-fuel mixture becomes imbalanced due to the vacuum leak. Engine performance may also suffer, resulting in reduced power and acceleration.
Hissing or whistling noises may be audible due to the air escaping from the leak. If you notice any of these symptoms along with an illuminated check engine light, there is a high probability of a vacuum leak.
Diagnosing and Fixing Vacuum Leaks
Diagnosing a vacuum leak requires a systematic approach. Start by visually inspecting the vacuum hoses for any signs of damage or disconnection. Look for cracks, splits, or loose connections. If a damaged hose is detected, it should be replaced with a new oneof the same size and material.
Additionally, check the integrity of the intake manifold gaskets and the PCV valve. Gaskets that are cracked or worn should be replaced, and a malfunctioning PCV valve should be replaced as well.
If a visual inspection does not reveal the source of the vacuum leak, you can use a vacuum gauge or a smoke machine to assist in the diagnosis.
A vacuum gauge measures the vacuum pressure in the system, and if there is a significant drop in pressure, it indicates a leak.
A smoke machine introduces smoke into the intake system, and if there is a leak, the smoke will escape and be visible. By following the smoke, you can pinpoint the location of the leak.
Once the vacuum leak is identified, the necessary repairs can be made. This may involve replacing damaged hoses, tightening loose connections, or replacing faulty components.
It is important to ensure that all repairs are done accurately and that the vacuum system is properly sealed to prevent further leaks.
After the repairs are completed, start the engine and monitor if the check engine light remains illuminated. If it turns off, it indicates that the vacuum leak has been successfully resolved.
Mass Airflow Sensor Problems
The mass airflow sensor (MAF) measures the amount of air entering the engine and provides this information to the engine control unit (ECU).
The ECU uses this data to calculate the appropriate fuel injection and ignition timing. If the MAF sensor is faulty or contaminated, it can provide inaccurate readings, leading to an imbalanced air-fuel mixture and the activation of the check engine light.
The Significance of the Mass Airflow Sensor
The mass airflow sensor is a critical component in the engine’s fuel management system. It ensures that the engine receives the correct amount of air for combustion, allowing for optimal performance and efficiency.
By accurately measuring the airflow, the MAF sensor helps the ECU determine the appropriate fuel-to-air ratio, ensuring efficient combustion and minimizing emissions. Any issues with the MAF sensor can disrupt this delicate balance and result in poor engine performance.
Signs of Mass Airflow Sensor Problems
Several symptoms can indicate a faulty or contaminated MAF sensor. These include a decrease in engine power and acceleration, rough idling, poor fuel efficiency, and an illuminated check engine light.
See Also: Car Problem Symbols [ Causes & Diagnosis ]
A faulty MAF sensor may provide incorrect readings to the ECU, resulting in an imbalanced air-fuel mixture. This imbalance can cause the engine to run rich or lean, leading to decreased power and acceleration.
Additionally, a contaminated MAF sensor can cause erratic readings, further affecting engine performance and fuel efficiency. If you experience any of these symptoms along with an illuminated check engine light, it is crucial to inspect and address the MAF sensor.
Steps to Address Mass Airflow Sensor Problems
If you suspect a problem with the MAF sensor, it is recommended to consult a professional mechanic who can perform diagnostic tests using specialized equipment. These tests can determine if the sensor is faulty or contaminated.
If a faulty sensor is detected, it should be replaced with a new one that matches the specifications of your vehicle. When replacing the MAF sensor, ensure that it is installed correctly and securely. Additionally, if the sensor is contaminated, it can be cleaned using specialized MAF sensor cleaner.
Follow the manufacturer’s instructions carefully when cleaning the sensor to avoid damage. After cleaning or replacing the MAF sensor, start the engine and monitor if the check engine light remains illuminated. If it does not, it indicates that the MAF sensor issue has been resolved.
Faulty Spark Plugs
Spark plugs play a crucial role in the combustion process by igniting the air-fuel mixture in the engine cylinders. Over time, spark plugs can wear out or become fouled, resulting in misfires and a decrease in engine performance.
Faulty spark plugs can trigger the check engine light as the engine’s sensors detect the misfires and signal a potential issue.
The Role of Spark Plugs
Spark plugs are responsible for creating the spark needed to ignite the air-fuel mixture in the combustion chamber.
This ignition initiates the combustion process, which powers the engine. Spark plugs are subjected to high temperatures and pressures, and over time, they can wear out or become fouled with carbon deposits or oil residue. Worn or fouled spark plugs can result in misfires, decreased power, and reduced fuel efficiency.
Signs of Faulty Spark Plugs
Several signs can indicate faulty spark plugs. These include rough idling, decreased acceleration, poor fuel efficiency, and an illuminated check engine light.
If the spark plugs are not functioning properly, misfires can occur, causing the engine to run erratically and resulting in a rough idle.
Additionally, misfires can lead to a decrease in acceleration, as the engine may not be able to generate enough power. Faulty spark plugs can also impact fuel efficiency, as the air-fuel mixture may not be properly ignited.
If you experience these symptoms along with an illuminated check engine light, it is important to inspect and address the condition of your spark plugs.
Steps to Replace Spark Plugs
If you suspect faulty spark plugs, it is recommended to consult a professional mechanic who can perform a thorough inspection and replace the spark plugs if necessary.
The process of replacing spark plugs involves several steps. Start by identifying the location of the spark plugs in your engine. In most vehicles, the spark plugs are located on top of the engine, connected to the ignition coils.
Remove the ignition coil cover or individual coil packs to access the spark plugs. Use a spark plug socket and a ratchet to carefully loosen and remove the old spark plugs. Inspect the condition of the plugs and compare them to the manufacturer’s specifications.
If the spark plugs are worn out, fouled, or damaged, they should be replaced with new ones that match the specifications of your vehicle. When installing the new spark plugs, ensure that they are properly gapped according to the manufacturer’s recommendations.
Carefully thread the spark plugs into the cylinder head by hand to avoid cross-threading, and then tighten them using the spark plug socket and ratchet. Finally, reattach the ignition coil cover or coil packs, ensuring that all connections are secure.
After replacing the spark plugs, start the engine and monitor if the check engine light remains illuminated. If it turns off, it indicates that the spark plug issue has been resolved.
Problems with the Catalytic Converter
The catalytic converter is an essential component of the vehicle’s exhaust system, responsible for reducing harmful emissions.
A malfunctioning catalytic converter can cause the check engine light to turn on. Issues with the catalytic converter can result from internal damage, overheating, or contamination, and can impact engine performance and emissions.
The Function of the Catalytic Converter
The catalytic converter plays a vital role in reducing harmful emissions produced by the engine. It contains a catalyst, usually made of platinum, palladium, and rhodium, which promotes chemical reactions that convert harmful gases, such as carbon monoxide and nitrogen oxides, into less harmful substances, such as carbon dioxide and nitrogen.
This process helps minimize the environmental impact of vehicle emissions and ensures compliance with emission standards. A properly functioning catalytic converter is crucial for optimal engine performance and reducing pollution.
Diagnosing Catalytic Converter Issues
Diagnosing problems with the catalytic converter requires a combination of visual inspection and diagnostic tests. Start by visually inspecting the converter for any signs of physical damage, such as dents or cracks.
Additionally, check for discoloration, as an overheated catalytic converter may appear bluish or purple. If any physical damage or discoloration is observed, it indicates a potential issue with the converter. However, further diagnostic tests are necessary to confirm the problem.
See Also: Car Swerving Light
These tests may include measuring the temperature of the converter using an infrared thermometer, checking the oxygen sensor readings, and performing a backpressure test to assess exhaust flow. It is recommended to consult a professional mechanic who can perform these tests accurately and provide an expert evaluation.
Addressing Catalytic Converter Issues
If a problem with the catalytic converter is identified, the necessary repairs or replacement must be performed. In some cases, minor issues, such as a loose heat shield or damaged oxygen sensor, can be addressed without replacing the entire converter.
However, if the converter is severely damaged or contaminated, replacement may be necessary. It is crucial to consult with a professional mechanic who can assess the condition of the converter and recommend the appropriate course of action.
After the necessary repairs or replacement are completed, start the engine and monitor if the check engine light remains illuminated. If it turns off, it indicates that the catalytic converter issue has been successfully resolved.
Issues with the Engine Control Module
The Engine Control Module (ECM), also known as the Engine Control Unit (ECU), is the brain of the vehicle’s engine management system. It controls various functions, including fuel injection, ignition timing, and emissions control.
Malfunctions in the ECM can result in an illuminated check engine light, as it detects issues with the engine’s performance or emissions.
Symptoms of ECM Problems
Several symptoms can indicate problems with the ECM. These include difficulty starting the engine, erratic idling, decreased engine performance, and an illuminated check engine light. If the ECM is not functioning properly, it may not send the correct signals to control various engine functions.
This can result in starting issues, as the fuel injection and ignition timing may not be optimized. Erratic idling can occur due to improper control of the air-fuel mixture or idlespeed.
Additionally, a malfunctioning ECM can cause a decrease in engine performance, resulting in reduced power and acceleration.
If you experience these symptoms along with an illuminated check engine light, it is crucial to have the ECM inspected and addressed.
Resolving ECM Issues
If you suspect a problem with the ECM, it is recommended to consult a professional mechanic who has the necessary diagnostic tools and expertise to evaluate and repair or replace the ECM.
The mechanic will perform diagnostic tests to identify the specific issue and determine the appropriate course of action. In some cases, the ECM may require reprogramming or resetting to resolve minor issues.
However, if the ECM is severely damaged or malfunctioning, replacement may be necessary. It is important to note that ECM replacement requires specialized knowledge and equipment, so it should be done by a professional.
After the necessary repairs or replacement are completed, start the engine and monitor if the check engine light remains illuminated. If it turns off, it indicates that the ECM issue has been successfully resolved.
Electrical System Malfunctions
The electrical system of a vehicle is responsible for powering various components and systems, including the engine control unit, sensors, ignition system, and more.
Malfunctions in the electrical system can cause the check engine light to illuminate after an oil change. Issues can range from loose connections and faulty wiring to problems with sensors or modules.
The Causes of Electrical System Malfunctions
Electrical system malfunctions can occur due to various reasons. Loose connections can disrupt the flow of electricity and affect the proper functioning of components.
Faulty wiring can result in short circuits or intermittent electrical problems. Additionally, issues with sensors or modules can cause incorrect signals to be sent to the engine control unit, leading to an illuminated check engine light.
Diagnosing and Fixing Electrical System Malfunctions
Diagnosing and fixing electrical system malfunctions can be complex and may require the expertise of a professional mechanic.
The mechanic will use diagnostic equipment to identify the specific electrical issue and determine the appropriate course of action. This may involve inspecting and tightening loose connections, repairing or replacing faulty wiring, or addressing issues with sensors or modules.
It is important to follow proper diagnostic procedures and use specialized tools to ensure accurate diagnosis and effective repairs.
Once the necessary repairs are completed, start the engine and monitor if the check engine light remains illuminated. If it turns off, it indicates that the electrical system malfunction has been successfully resolved.
In conclusion, the check engine light coming on after an oil change can be caused by various factors. It is important to address the issue promptly to prevent further damage to the engine and ensure the optimal performance of your vehicle.
By understanding the potential causes and following the steps outlined in this comprehensive guide, you can diagnose and address the problem effectively.
However, if you are unsure about any aspect or unable to resolve the issue yourself, it is always advisable to consult a professional mechanic for further assistance.
Taking prompt action and seeking expert help when needed will help you maintain the health and longevity of your vehicle.
Related video of Why is My Check Engine Light On After an Oil Change?

- Used Trucks for Sale in California Under 10000 Low Mileage - July 21, 2026
- Used Trucks for Sale in California Under 10000 Good Condition - July 20, 2026
- Used Trucks for Sale in California Under 10000 No Credit Check - July 19, 2026