
This post contains affiliate links. This means I will make a commission at no extra cost to you should you click through and make a purchase [ “As an Amazon Associate, I earn from qualifying purchases.” ]. Read the full disclosure here.
Chevy Malibu Alternator GuideMechanic.Com When it comes to the performance and reliability of your Chevy Malibu, few components play as crucial a role as the alternator.
This unsung hero ensures that your vehicle’s electrical system runs smoothly, charging the battery and powering all the electrical accessories.
However, understanding how the alternator works and how to properly maintain it can be a daunting task for many car owners.
In this comprehensive guide, we will dive deep into the world of Chevy Malibu alternators. From explaining the basic principles behind their operation to providing maintenance tips and troubleshooting advice, this article aims to equip you with the knowledge needed to keep your alternator in top shape.
See Also: 2011 Chevy Cruze Headlight Bulb
So, whether you’re a seasoned car enthusiast or a first-time Malibu owner, read on to discover all you need to know about this essential component.
What is an Alternator?
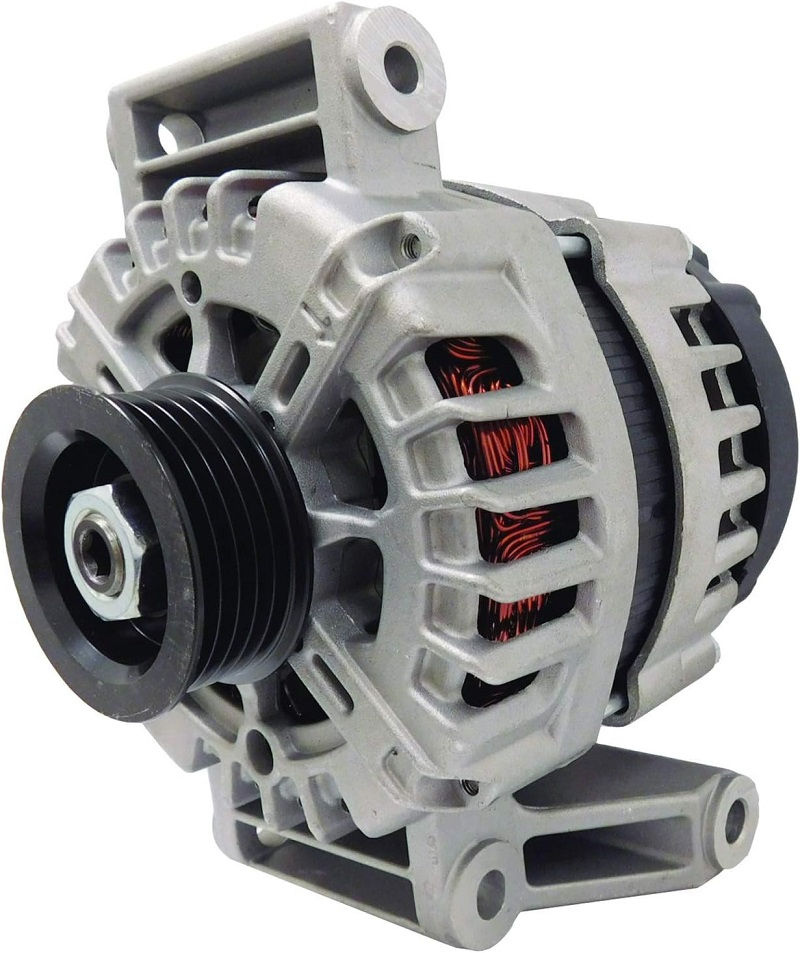
Check out this New Alternator Compatible With Chevrolet Chevy Cobalt 2.2L 2.4L 2008-2010, Malibu 2.4L 2008-2012
At the heart of your Chevy Malibu’s electrical system lies the alternator, a critical component responsible for generating electricity. Unlike the battery, which stores electrical energy, the alternator converts mechanical energy into electrical energy.
By harnessing the rotational power of the engine, it supplies a constant stream of electricity to keep the battery charged and power the various electrical systems in your vehicle.
Understanding the inner workings of an alternator can help you appreciate its importance and troubleshoot any potential issues that may arise.
Components of an Alternator
An alternator consists of several key components working in harmony to produce electrical power. The primary elements include:
- Stator: This stationary component is composed of wire windings arranged in a circular pattern. When the rotor spins, the magnetic field created induces an electric current in the stator windings.
- Rotor: The rotor, also known as the armature, is the rotating part of the alternator. It consists of a magnetic core surrounded by wire windings. As the rotor spins, it generates a magnetic field, which interacts with the stator windings to produce electricity.
- Diode Rectifier: The diode rectifier is responsible for converting the alternating current (AC) produced by the alternator into direct current (DC) that the vehicle’s electrical system can use. It allows current to flow in one direction while blocking it in the opposite direction.
- Voltage Regulator: The voltage regulator ensures that the electrical output from the alternator remains within a specified range. It controls the amount of current flowing to the battery and the electrical accessories, preventing overcharging or undercharging.
How Does an Alternator Work?
The operation of an alternator can be summarized in a few key steps:
- When the engine starts, the drive belt connected to the crankshaft spins the alternator’s rotor.
- As the rotor turns, it creates a magnetic field due to the interaction between the wire windings and the magnetic core.
- The spinning rotor induces an electric current in the stator windings through electromagnetic induction.
- The alternating current (AC) produced by the stator is converted into direct current (DC) by the diode rectifier.
- The voltage regulator controls the electrical output, adjusting the charging rate to meet the demands of the battery and electrical system.
- The electricity generated by the alternator is used to charge the battery and power the various electrical accessories in the vehicle.
The Importance of a Reliable Alternator
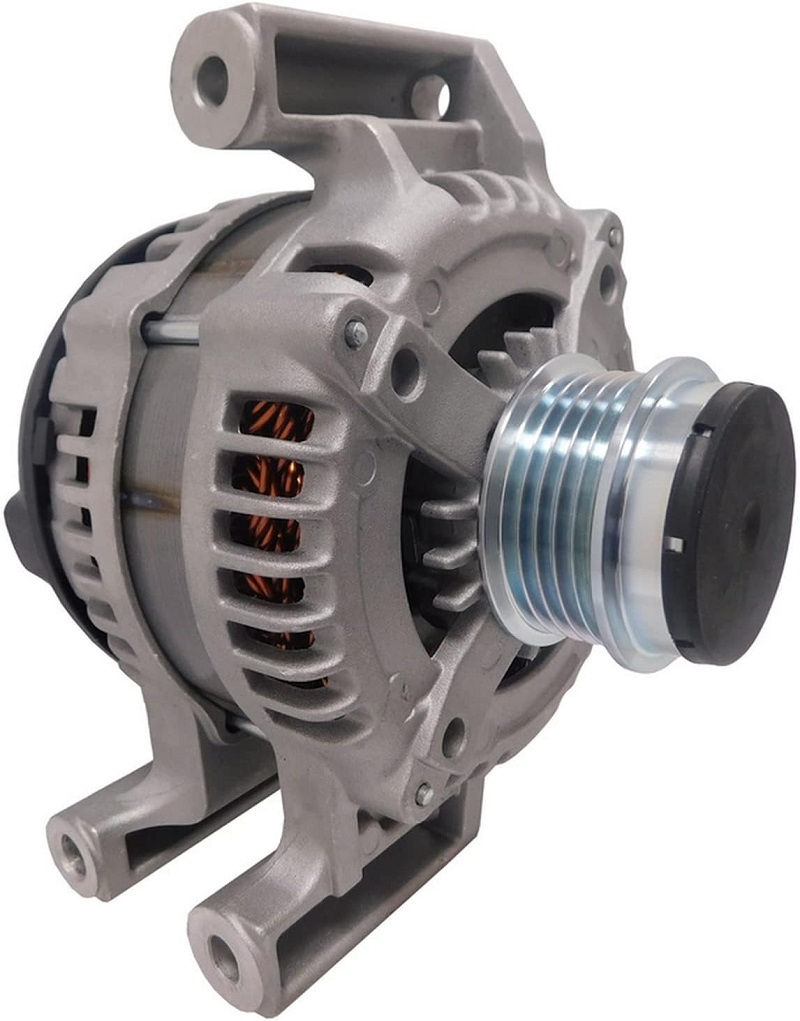
Check out this New Alternator Compatible With Cadillac Car CTS ATS 2.0L 2.5L 13-16, Chevy Camaro 2.0L 2016, Malibu Impala 2.0L 2.5L 13-16
The alternator is a critical component that directly impacts the performance and functionality of your Chevy Malibu. A reliable alternator ensures a steady supply of electrical power, allowing your vehicle’s electrical systems to function optimally.
See Also: 2014 Chevy Cruze Headlight Bulb
On the other hand, a failing or faulty alternator can lead to a myriad of problems, ranging from dimming lights to complete electrical failure.
Powering the Electrical Systems
One of the primary roles of the alternator is to power the electrical systems in your Chevy Malibu. From the headlights and windshield wipers to the audio system and air conditioning, these accessories rely on the continuous supply of electricity provided by the alternator.
Without a properly functioning alternator, these systems may operate erratically or fail altogether, compromising your driving experience and safety on the road.
Charging the Battery
The alternator plays a crucial role in charging the battery and maintaining its optimal performance. When the engine is running, the alternator supplies electrical power to replenish the charge lost during vehicle operation and start-ups.
A fully charged battery ensures reliable engine starts and provides the necessary power for the various electrical components when the engine is off. Without a functioning alternator, the battery will eventually drain, resulting in a vehicle that won’t start.
Preventing Battery Drain
In addition to charging the battery, the alternator also prevents excessive discharge when the electrical load exceeds the battery’s capacity. Without the alternator’s continuous supply of electricity, the battery would quickly drain, leaving you stranded.
By maintaining a healthy alternator, you can avoid the inconvenience and cost of frequently replacing a depleted battery.
Optimizing Fuel Efficiency
A properly functioning alternator can also contribute to improved fuel efficiency. When the alternator is generating electricity, it reduces the load on the engine, allowing it to operate more efficiently. This, in turn, can lead to better fuel economy, saving you money at the pump and reducing your environmental impact.
Signs of a Failing Alternator
Check out this BDK (4-Pack Premium 15″ Wheel Rim Cover Hubcaps OEM Style Replacement Snap On Car Truck SUV Hub Cap – 15 Inch Set

Recognizing the warning signs of a failing alternator is crucial to prevent further damage and costly repairs. While some symptoms may be subtle at first, they can quickly escalate into more significant issues if left unaddressed.
See Also: 2012 Chevy Cruze Headlight Bulb
By staying vigilant and identifying these signs early on, you can take appropriate action to rectify the problem and ensure the continued operation of your Chevy Malibu.
Dimming or Flickering Lights
One of the most common signs of a failing alternator is dimming or flickering lights. If you notice that your headlights, interior lights, or dashboard lights are noticeably dimmer than usual or flickering intermittently, it could indicate a problem with the alternator.
The alternator may not be generating enough electricity to meet the demand, causing the lights to lose their brightness or fluctuate in intensity.
Strange Noises
Unusual noises coming from the engine bay, particularly a grinding or whining sound, can be indicative of a failing alternator.
These noises may be caused by faulty bearings or a worn-out rotor. If you hear any abnormal sounds while your vehicle is running, it’s essential to have the alternator inspected promptly to prevent further damage.
Warning Lights
Modern vehicles are equipped with warning lights on the dashboard that illuminate when there is a problem with various components, including the alternator. Keep an eye out for the battery or charging system warning light, which typically resembles a battery symbol or the word “ALT.” If this light comes on while driving, it signifies an issue with the alternator or the charging system and requires immediate attention.
Electrical Malfunctions
A failing alternator can cause various electrical malfunctions in your vehicle. These may include malfunctioning power windows, erratic gauge readings, or issues with the audio system.
If you experience multiple electrical problems simultaneously, it’s likely that the alternator is struggling to provide sufficient power to all the electrical components.
Intermittent Starting Issues
If you find yourself having trouble starting your Chevy Malibu, particularly after the vehicle has been sitting for a while, it could be a sign of a failing alternator.
When the alternator is unable to charge the battery adequately, it may not have enough power to start the engine.
While a weak battery can also cause starting issues, it’s essential to have the alternator checked to rule out any problems.
Maintaining Your Alternator: Best Practices
Proper maintenance is key to ensuring the longevity and optimal performance of your Chevy Malibu’s alternator. By following a few simple best practices, you can minimize the risk of alternator failure and avoid costly repairs down the road.
Regular Inspections
Performing regular visual inspections of your alternator can help you identify any potential issues early on. Start by inspecting the drive belt for signs of wear or damage. A worn or cracked belt can slip, causing the alternator to underperform.
See Also: Engine Power Reduced Chevy Equinox
Additionally, check for loose or corroded electrical connections, as these can disrupt the flow of electricity and lead to charging problems.
Cleaning the Alternator
Over time, dirt, debris, and grime can accumulate on the surface of the alternator, hindering its performance. To ensure optimal operation, periodically clean the alternator using a soft brush or compressed air.
Be gentle when cleaning to avoid damaging any delicate components. If you notice significant build-up that cannot be easily removed, it’s advisable to seek professional assistance.
Protecting from Moisture and Extreme Temperatures
Moisture and extreme temperatures can adversely affect the performance of your alternator. Whenever possible, park your vehicle in a covered or shaded area to protect the alternatorfrom direct exposure to rain, snow, or excessive heat.
If you live in an area with extreme weather conditions, consider using a protective cover for your vehicle or installing a heat shield to minimize the impact on the alternator.
Avoid Overloading the Electrical System
Excessive electrical loads can put strain on the alternator, potentially leading to premature failure. Avoid overloading the electrical system by minimizing the use of power-hungry accessories when the engine is not running.
Additionally, be cautious when adding aftermarket electrical components to your vehicle, as they may place additional demands on the alternator.
Regular Battery Maintenance
A healthy battery is essential for the proper functioning of the alternator. Regularly check the battery’s fluid levels and ensure that the terminals are clean and free of corrosion.
If you suspect any issues with your battery, have it tested and replaced if necessary. A weak or faulty battery can place additional strain on the alternator, potentially leading to its failure.
Follow Manufacturer Recommendations
Always refer to your vehicle’s manufacturer recommendations for specific maintenance intervals and procedures.
These guidelines will provide insight into when certain components, such as the drive belt or tensioner, should be inspected or replaced.
Adhering to these recommendations can help you catch potential issues before they escalate and ensure the optimal performance of your alternator.
Alternator Replacement: DIY or Professional Help?
When the time comes to replace your alternator, you may find yourself debating whether to tackle the task yourself or seek professional assistance.
See Also: Chevy Truck Losing Power When Accelerating
While DIY alternator replacement can be a cost-effective option for those with mechanical skills, it’s essential to consider your level of expertise, available tools, and the complexity of the task at hand.
DIY Alternator Replacement
If you are confident in your mechanical abilities and have access to the necessary tools, replacing your alternator yourself can save you money on labor costs.
However, it’s crucial to remember that alternator replacement can be a complex procedure, with various electrical connections and components involved.
Before attempting a DIY replacement, be sure to gather all the required information, such as a detailed service manual or online tutorials, to ensure you have a clear understanding of the steps involved.
Professional Alternator Replacement
If you are uncomfortable or inexperienced with automotive repairs, it’s advisable to seek professional help for alternator replacement.
Automotive technicians have the expertise, experience, and specialized tools necessary to complete the job efficiently and accurately.
They can also diagnose any other potential issues that may be contributing to alternator problems, ensuring a comprehensive solution.
Cost of Alternator Replacement
When facing alternator replacement, it’s natural to wonder about the associated costs. The total cost can vary depending on several factors, including the make and model of your Chevy Malibu, the brand and quality of the alternator, and whether you choose to have it replaced by a professional or do it yourself.
Cost of the Alternator
The cost of the alternator itself can range from around $100 to $500, depending on various factors. OEM (Original Equipment Manufacturer) alternators tend to be more expensive compared to aftermarket options.
Additionally, higher-output alternators or those with advanced features may come with a higher price tag. Research and compare prices from reputable sources to find a balance between quality and affordability.
Labor Costs
If you opt for professional alternator replacement, be prepared for labor costs to be added to the overall expense. Labor rates can vary depending on your location and the specific repair shop you choose.
It’s advisable to obtain quotes from multiple service providers to ensure you’re getting a fair price. Keep in mind that labor costs may be higher if additional repairs or troubleshooting are required.
DIY Cost Considerations
DIY alternator replacement can save you money on labor costs, but it’s important to consider other expenses that may arise.
You may need to purchase or rent specialized tools if you don’t already have them. Additionally, it’s a good idea to invest in a new drive belt and other related components to ensure a complete and thorough replacement. Factor in these costs when comparing DIY versus professional alternatives.
Upgrading Your Alternator: Is It Worth It?
If you’re considering upgrading your Chevy Malibu’s alternator, it’s essential to weigh the potential benefits against the associated costs.
While an upgraded alternator may offer improved performance and power capabilities, it may not be necessary or worthwhile for every driver.
Increased Electrical Power
One of the primary benefits of upgrading to a higher output alternator is the increased electrical power it can provide.
This can be advantageous if you have added aftermarket accessories or equipment that require more electricity to operate effectively.
Upgrading the alternator ensures that your electrical system can handle the additional load without straining the components or experiencing voltage drops.
Improved Charging Efficiency
A higher output alternator can also improve charging efficiency, allowing your battery to charge more quickly and maintain a higher state of charge.
This can be particularly beneficial if you frequently take short drives or have a high demand for electricity in your vehicle. With an upgraded alternator, you can ensure that your battery remains properly charged, reducing the risk of a weak or dead battery.
Consideration of Other Components
When contemplating an alternator upgrade, it’s important to consider the compatibility and capacity of other components in your vehicle’s electrical system.
Upgrading the alternator may necessitate upgrading other components, such as the battery or wiring, to handle the increased electrical load. Failing to address these considerations could lead to further issues down the line.
Cost versus Benefit Analysis
Ultimately, the decision to upgrade your alternator should be based on a cost versus benefit analysis. Consider the cost of the upgraded alternator, additional components, and any necessary labor.
Evaluate these expenses against the potential benefits, such as improved electrical power and charging efficiency. If the benefits outweigh the costs and align with your specific needs, upgrading the alternator may be a worthwhile investment.
Alternator Troubleshooting Guide
When faced with alternator-related issues, having a troubleshooting guide can help you diagnose the problem and determine the appropriate course of action. By following a systematic approach, you can identify common alternator problems and potentially address them before they worsen.
Step 1: Check Battery Connections
Begin by inspecting the battery connections for any signs of corrosion, looseness, or damage. Clean the terminals if necessary and ensure they are securely tightened. Faulty or loose connections can disrupt the flow of electricity, leading to charging problems.
Step 2: Test Battery Voltage
Use a multimeter to measure the voltage across the battery terminals with the engine off. A fully charged battery should read around 12.6 volts. If the voltage is significantly lower, it may indicate a problem with the alternator or charging system.
Step 3: Check Drive Belt Tension
A loose or worn drive belt can cause the alternator to underperform. Inspect the drive belt for signs of wear, cracks, or looseness. If necessary, adjust the tension or replace the belt to ensure proper operation of the alternator.
Step 4: Test Alternator Output
With the engine running, use a multimeter to measure the voltage across the battery terminals. A healthy alternator should produce a voltage between 13.5 and 14.5 volts. If the voltage is significantly lower or higher, it may indicate a problem with the alternator or voltage regulator.
Step 5: Inspect Alternator Wiring
Inspect the wiring connected to the alternator for any signs of damage, fraying, or loose connections. Ensure that all electrical connections are secure and free of corrosion. Faulty wiring can disrupt the flow of electricity and lead to charging issues.
Step 6: Test Diode Rectifier
The diode rectifier is responsible for converting AC to DC current. Use a multimeter set to the diode test mode to check the functionality of each diode. A faulty diode can cause the alternator to produce inconsistent or insufficient power.
Step 7: Seek Professional Assistance
If you have followed the troubleshooting steps and are unable to identify or resolve the issue, it may be time to seek professional assistance. Automotive technicians have the expertise and specialized equipment to diagnose and repair alternator problems accurately.
Frequently Asked Questions about Chevy Malibu Alternators
Here are answers to some commonly asked questions regarding Chevy Malibu alternators:
Q: Can I drive with a faulty alternator?
A: It is not recommended to drive with a faulty alternator as it can lead to a drained battery and eventual loss of electrical power in your vehicle.
Q: How long does an alternator last?
A: The lifespan of an alternator can vary depending on various factors, including usage, driving conditions, and maintenance. On average, an alternator can last between 80,000 to 150,000 miles.
Q: Can a bad alternator damage my battery?
A: Yes, a bad alternator can cause your battery to become discharged ordamaged. If the alternator is not providing sufficient charging power, the battery may not receive the necessary charge, leading to a weakened battery over time.
Additionally, an alternator that overcharges the battery can also cause damage to the battery’s cells, shortening its lifespan.
Q: How often should I replace my alternator?
A: There is no set timeframe for alternator replacement as it can vary depending on several factors. It is best to monitor your alternator’s performance and address any signs of failure promptly. Regular maintenance and inspections can help extend the lifespan of your alternator.
Q: Can I use a used alternator for replacement?
A: While it is possible to use a used alternator for replacement, it is generally not recommended. Used alternators may have unknown histories and could be prone to failure. It is best to invest in a new or remanufactured alternator for optimal performance and reliability.
Q: Can I install a higher-output alternator without any modifications?
A: Installing a higher-output alternator may require modifications or upgrades to other components in your vehicle’s electrical system. It is important to consult with a professional or refer to manufacturer guidelines to ensure compatibility and proper function.
Q: How can I preserve the lifespan of my alternator?
A: Regular maintenance, including keeping the alternator clean, inspecting and tightening connections, and avoiding excessive electrical loads, can help preserve the lifespan of your alternator. Additionally, addressing any issues promptly and following manufacturer recommendations can contribute to its longevity.

- Used Trucks for Sale in Texas Under 15000 No Credit Check - July 1, 2026
- Used Trucks for Sale in Texas Under 15000 With Warranty - June 30, 2026
- Used Trucks for Sale in Texas Under 15000 Low Mileage - June 29, 2026