
This post contains affiliate links. This means I will make a commission at no extra cost to you should you click through and make a purchase [ “As an Amazon Associate, I earn from qualifying purchases.” ]. Read the full disclosure here.
Alternator 2006 Honda Pilot GuideMechanic.Com Are you a proud owner of a 2006 Honda Pilot? If so, it’s important to understand the intricacies of your vehicle’s alternator. This crucial component plays a vital role in keeping your car’s electrical system functioning properly.
In this comprehensive guide, we will delve into the specifics of the alternator in a 2006 Honda Pilot, covering everything from its function to common issues and maintenance tips. So, let’s get started and ensure that you have a solid understanding of your Honda Pilot’s alternator!
How Does the Alternator Work in a 2006 Honda Pilot?
Understanding the Internal Components
The alternator in a 2006 Honda Pilot consists of several internal components that work together to generate electricity. These include the rotor, stator, diode bridge, and voltage regulator.
The rotor is a rotating component driven by the engine’s crankshaft, while the stator is a stationary part with wire windings.
The diode bridge rectifies the alternating current (AC) produced by the rotor into direct current (DC), and the voltage regulator regulates the output voltage to maintain a steady charge.
See Also: Catalytic Converter Honda Odyssey
Converting Mechanical Energy into Electrical Energy
The alternator converts mechanical energy from the engine’s rotation into electrical energy. As the engine runs, the crankshaft turns the alternator’s rotor, which generates a magnetic field.
This magnetic field induces an electrical current in the stator windings, producing an alternating current (AC). The diode bridge then converts this AC into a direct current (DC), which is the type of electricity used to power the vehicle’s electrical components.
The Role of the Electrical System
The alternator works in conjunction with the vehicle’s electrical system to provide power to various components. The electrical system consists of the battery, alternator, and various wires, fuses, and relays.
When the engine is running, the alternator supplies electricity to the system, charging the battery and powering the lights, radio, air conditioning, and other electrical components. It also ensures that the battery maintains its charge, allowing the vehicle to start smoothly.
Signs of a Failing Alternator
Dimming Lights or Electrical Issues
Check out this SCITOO Alternator Fit for Honda Odyssey Alternator 2008 2009 2010, for Honda Pilot Alternator 2009 2010 2011 3.5L AL1311X

One of the most common signs of a failing alternator in a 2006 Honda Pilot is dimming lights. If you notice that your headlights, interior lights, or dashboard lights are flickering or becoming noticeably dimmer, it may indicate a problem with the alternator.
This occurs because the alternator is no longer generating enough electricity to meet the demands of the vehicle’s electrical system.
Strange Noises or Smells
Another potential sign of a failing alternator is the presence of strange noises or smells. If you hear grinding, whining, or squealing sounds coming from the engine bay, it may indicate a problem with the alternator’s bearings or belt. Additionally, a burning smell, often accompanied by smoke, can indicate an overheated alternator or electrical wires.
Warning Lights on the Dashboard
Your 2006 Honda Pilot is equipped with warning lights on the dashboard to alert you to various issues, including problems with the alternator.
If you see the battery or charging system warning light illuminated while driving, it is a clear indication that there is a problem with the alternator.
It’s important not to ignore these warning lights, as continued driving with a failing alternator can lead to further electrical issues or even a complete loss of power.
Difficulty Starting the Engine
A failing alternator can also manifest in difficulty starting the engine. If you find that your 2006 Honda Pilot is slow to start, requires multiple attempts, or fails to start altogether, it may be due to a lack of power from the battery.
Since the alternator is responsible for charging the battery, a faulty alternator can result in a drained battery and subsequent starting issues.
Electrical System Malfunctions
In addition to the specific signs mentioned above, a failing alternator can cause a range of electrical system malfunctions in your 2006 Honda Pilot.
These may include malfunctioning power windows, erratic behavior of the air conditioning system, radio or audio system issues, or intermittent failures of various electrical components.
If you notice any unusual behavior or malfunctions, it’s best to have your alternator inspected as soon as possible.
Troubleshooting Alternator Issues in a 2006 Honda Pilot
Checking the Battery Voltage
Check out this Alternator NEW compatible with Honda Pilot 3.5L 2005 2006 2007 2008 w/ 104210-4290

One of the first steps in troubleshooting alternator issues in a 2006 Honda Pilot is to check the battery voltage. Start by turning off the engine and connecting a digital multimeter to the battery terminals.
A healthy battery should read around 12.6 volts. If the voltage is significantly lower, it may indicate a problem with the alternator not properly charging the battery.
See Also: 2007 Honda Odyssey AC Compressor
Inspecting the Alternator Belt
The alternator belt is responsible for transferring power from the engine to the alternator’s rotor. Over time, the belt can become worn, loose, or damaged, resulting in a loss of power generation.
Inspect the belt for signs of wear, cracks, or slackness. If any issues are detected, the belt may need to be tightened or replaced to restore proper alternator function.
Testing the Alternator Output
To determine if the alternator is producing the correct amount of electricity, you can perform a simple output test. Start the engine and connect a voltmeter to the battery terminals.
Ideally, the voltage reading should be between 13.5 and 14.5 volts with the engine running. If the voltage is consistently below or above this range, it may indicate a faulty alternator that requires further inspection or replacement.
Checking the Alternator Connections
Faulty or loose connections can lead to poor electrical flow and affect the performance of the alternator. Inspect the alternator’s wiring and connections, ensuring that they are clean, tight, and free from corrosion.
If any corrosion or damage is present, clean the connections and replace any damaged wires or terminals. Secure connections will ensure optimal electrical flow and prevent potential alternator issues.
Testing the Voltage Regulator
In some cases, the voltage regulator within the alternator may be the source of the problem. The voltage regulator controls the output voltage of the alternator and ensures that it remains within the appropriate range.
If the voltage regulator is faulty, it can result in overcharging or undercharging of the battery. Testing the voltage regulator requires specialized equipment and may require professional assistance.
Alternator Maintenance Tips
Cleaning the Alternator Connections
Regularly cleaning the alternator connections is an important maintenance task to ensure optimal electrical flow. Over time, corrosion and dirt can accumulate on the connections, hindering the alternator’s performance.
Use a wire brush or a specialized electrical contact cleaner to remove any dirt or corrosion from the terminals and connectors. This will help maintain a strong and reliable electrical connection.
Inspecting the Alternator Belt
Regularly inspecting the condition of the alternator belt is crucial for maintaining proper alternator function. Check the belt for signs of wear, cracks, or slackness.
If any issues are detected, such asfraying or excessive looseness, it’s important to replace the belt promptly.
A worn or damaged belt can slip or break, resulting in a loss of power generation and potential damage to the alternator and other engine components.
Maintaining Proper Battery Health
The health of your vehicle’s battery directly impacts the performance of the alternator. Regularly check the battery’s electrolyte levels and ensure they are topped up with distilled water, if applicable.
Additionally, keep the battery terminals clean and free from corrosion by using a mixture of baking soda and water or a specialized battery terminal cleaner.
Corrosion on the battery terminals can hinder the flow of electricity and affect the alternator’s ability to charge the battery effectively.
Reducing Electrical Loads
Minimizing the strain on the alternator can help prolong its lifespan. Avoid using unnecessary electrical components simultaneously, such as high-powered audio systems, auxiliary lights, or charging multiple devices.
By reducing the electrical load, the alternator can focus on supplying power to essential components, ensuring optimal performance and longevity.
Regular Professional Inspections
While some maintenance tasks can be performed by vehicle owners, it’s recommended to have your 2006 Honda Pilot’s alternator inspected by a professional during regular maintenance intervals.
A qualified technician can thoroughly assess the alternator’s condition, test its output, and identify any potential issues before they escalate. Regular inspections will help catch any problems early on and ensure the alternator continues to function optimally.
Replacing the Alternator
Gather the Necessary Tools and Parts
Before replacing the alternator in your 2006 Honda Pilot, gather all the necessary tools and parts. You will typically need a socket set, wrenches, a pry bar, and a new alternator that is compatible with your vehicle’s make and model. Ensure that the replacement alternator matches the specifications and electrical output of the original unit.
See Also: 2002 Honda Odyssey Catalytic Converter
Disconnect the Battery
Prior to removing the old alternator, disconnect the negative terminal of the battery to prevent any electrical mishaps. This step is crucial to ensure your safety during the replacement process.
Remove the Old Alternator
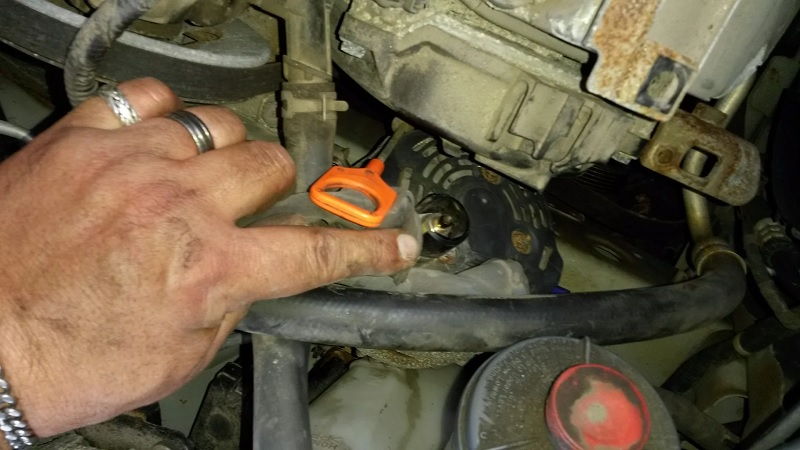
Start by locating the alternator in your 2006 Honda Pilot’s engine bay. It is typically mounted on the engine block and connected to various components. Follow the manufacturer’s instructions or consult a repair manual for your specific vehicle to properly remove the old alternator. This may involve disconnecting electrical connections, removing mounting bolts, and detaching the alternator belt.
Install the New Alternator
Once the old alternator is removed, carefully install the new alternator in its place. Ensure that all electrical connections are properly reconnected and that the alternator is securely mounted using the appropriate bolts. Refer to the manufacturer’s instructions or a repair manual to ensure proper installation.
Reconnect the Battery
After the new alternator is installed, reconnect the negative terminal of the battery. This will restore power to the vehicle’s electrical system and allow you to test the functionality of the new alternator.
Test the New Alternator
Start the engine and check the voltage output of the new alternator using a voltmeter. The voltage should read between 13.5 and 14.5 volts, indicating that the alternator is functioning correctly. If the voltage is not within this range, further inspection or adjustments may be required.
Dispose of the Old Alternator Properly
Ensure that you dispose of the old alternator properly. Take it to a recycling center or an authorized automotive disposal facility. Many alternators contain hazardous materials that can harm the environment if not disposed of correctly.
Costs of Alternator Replacement
Factors Affecting the Cost
Check out this RANSOTO Replace AND0339 31100-RJA-A01 Alternator Compatible with 2003-2009 Acura MDX RL TL 2005-2008 Honda Odyssey Pilot Ridgeline

The cost of replacing the alternator in a 2006 Honda Pilot can vary depending on several factors. These include the brand and quality of the alternator, whether it is a genuine original equipment manufacturer (OEM) part or an aftermarket alternative, and whether you choose to replace it yourself or have it professionally installed. Additionally, labor costs may vary depending on your location and the specific repair shop or dealership you choose.
Estimates for DIY Replacement
If you have the necessary skills and tools, replacing the alternator yourself can save you money on labor costs. Aftermarket alternators for a 2006 Honda Pilot typically range from $100 to $300, depending on the brand and quality.
Keep in mind that the price may also vary based on the warranty offered by the manufacturer. However, it’s important to ensure that you have the knowledge and experience to perform the replacement correctly to avoid any potential issues.
Estimates for Professional Replacement
If you prefer to have a professional handle the alternator replacement, labor costs will be an additional expense. The cost of labor can vary significantly depending on your location and the specific repair shop or dealership.
On average, professional alternator replacement for a 2006 Honda Pilot can range from $200 to $500, including the cost of the alternator itself. It’s recommended to obtain quotes from multiple sources and compare prices to find the most competitive option.
See Also: 2009 Honda Accord Catalytic Converter
Finding Affordable and Reliable Alternators
When purchasing an alternator, it’s crucial to balance affordability with reliability. While aftermarket alternators may be more budget-friendly, it’s important to choose a reputable brand known for producing reliable components. Consider reading reviews and checking the warranty offered by the manufacturer to ensure you’re investing in a quality alternator that will provide long-lasting performance.
Tips for Extending Alternator Lifespan
Reduce Electrical Loads
Minimizing the electrical load on the alternator can help extend its lifespan. Avoid using unnecessary electrical components simultaneously and turn off any accessories when they are not in use. This will reduce the strain on the alternator and help it operate more efficiently.
Regularly Inspect and Clean Connections
Inspect the alternator’s electrical connections regularly and ensure they are clean, tight, and free from corrosion. Corrosion can hinder the flow of electricity, affecting the alternator’s performance. Use a wire brush or a specialized electrical contact cleaner to remove any dirt or corrosion from the terminals and connectors.
Maintain Proper Battery Health
Proper battery maintenance is essential for the overall health of the electrical system, including the alternator. Regularly check the battery’s electrolyte levels, keep the terminals clean, and ensure a secure connection. Maintaining a healthy battery will reduce the strain on the alternator and help it operate optimally.
Perform Regular Inspections and Maintenance
Regular inspections and maintenance are key to extending the lifespan of your alternator. Schedule regular check-ups with a professional technician who can thoroughly assess the condition of your alternator and perform any necessary maintenance tasks. This may include cleaning connections, inspecting the belt, and testing the output voltage. By staying proactive with maintenance, you can catch any potential issues early on and prevent further damage to the alternator.
Avoid Excessive Heat Exposure
Excessive heat can be detrimental to the performance and lifespan of your alternator. Whenever possible, park your vehicle in shaded areas or use a sunshade to protect the engine bay from direct sunlight. High temperatures can cause the alternator to overheat, leading to potential internal damage. By minimizing heat exposure, you can help prolong the life of your alternator.
Avoid Overloading the Electrical System
Overloading the electrical system can put unnecessary strain on the alternator. Be mindful of the electrical components you use and avoid excessive usage of high-powered accessories. Distribute the electrical load evenly and prioritize essential functions. By avoiding overloading the system, you can help ensure that the alternator can handle the demands placed upon it.
Address Issues Promptly
If you notice any signs of alternator problems, such as dimming lights or strange noises, address them promptly. Ignoring these warning signs can lead to further damage to the alternator and other electrical components.
As soon as you suspect an issue, consult a professional technician to diagnose and resolve the problem. Timely repairs or replacements can help prevent more extensive and costly repairs down the line.
See Also: 2006 Honda Pilot Catalytic Converter

- Project Trucks for Sale Cheap - July 1, 2025
- Salvage Title Trucks for Sale - July 1, 2025
- Restored Classic Trucks for Sale - July 1, 2025