

This post contains affiliate links. This means I will make a commission at no extra cost to you should you click through and make a purchase [ “As an Amazon Associate, I earn from qualifying purchases.” ]. Read the full disclosure here.
KIA Check Engine Light GuideMechanic.Com Are you troubled by the sudden appearance of the check engine light in your Kia? Don’t panic! This blog article will provide you with a comprehensive guide on understanding the causes behind the check engine light, diagnosing the issue, and finding effective solutions.
Whether you’re a Kia owner or simply curious about this common car problem, read on to gain valuable insights and knowledge.
When it comes to your vehicle’s check engine light, it’s important not to ignore it. This warning light is designed to alert you to potential issues within your Kia’s engine system.
Understanding the causes of the check engine light can help you take the necessary steps to address the problem and prevent further damage.
In this article, we will cover everything you need to know about the Kia check engine light. From common reasons for its illumination to the steps you can take to diagnose the issue, we’ve got you covered.
See Also: Kia Sportage Catalytic Converter
Additionally, we will explore the potential consequences of ignoring the check engine light and discuss how to resolve the problem in a cost-effective manner.
Understanding the KIA Check Engine Light

Modern vehicles are equipped with a sophisticated onboard diagnostics system that continuously monitors various aspects of the engine’s performance.
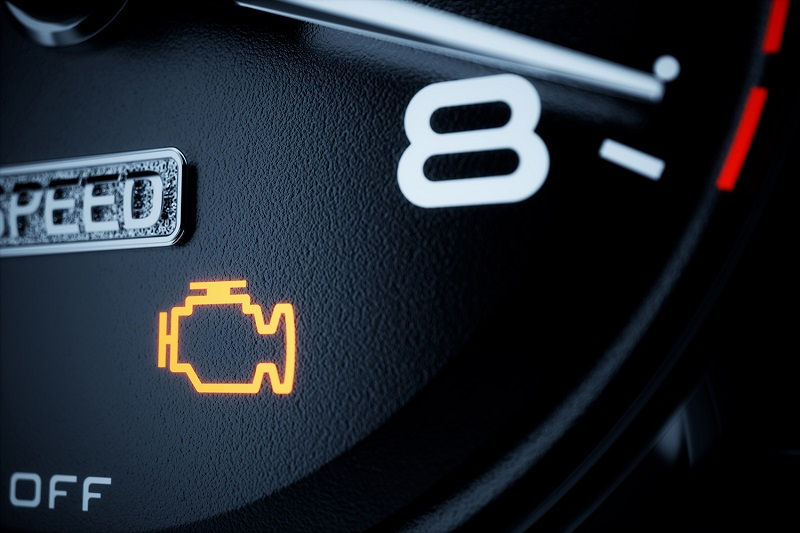
The check engine light, also known as the malfunction indicator lamp (MIL), serves as an early warning system. When the system detects a potential issue, it triggers the check engine light to illuminate on the dashboard.
The check engine light is typically represented by an engine symbol or the words “check engine” on your Kia’s instrument cluster.
It can vary in color, commonly appearing as amber or yellow. When the light turns on, it indicates that the engine control module (ECM) has detected a problem.
The Purpose of the Check Engine Light
The check engine light is designed to inform you about engine-related issues that may affect your Kia’s performance, emissions, or overall drivability. It serves as an early warning system, allowing you to take prompt action and prevent further damage.
Importance of Addressing the Check Engine Light
Ignoring the check engine light can lead to more severe problems and potentially costly repairs. Even if your Kia seems to be running fine, it’s essential to address the underlying issue that triggered the light.
Continuing to drive with a lit check engine light can result in decreased fuel efficiency, engine damage, or even a complete breakdown.
Common Causes of a Kia Check Engine Light
There are numerous reasons why your Kia’s check engine light may illuminate. Some issues may be minor and easily resolved, while others may require professional attention. Here are some common causes:
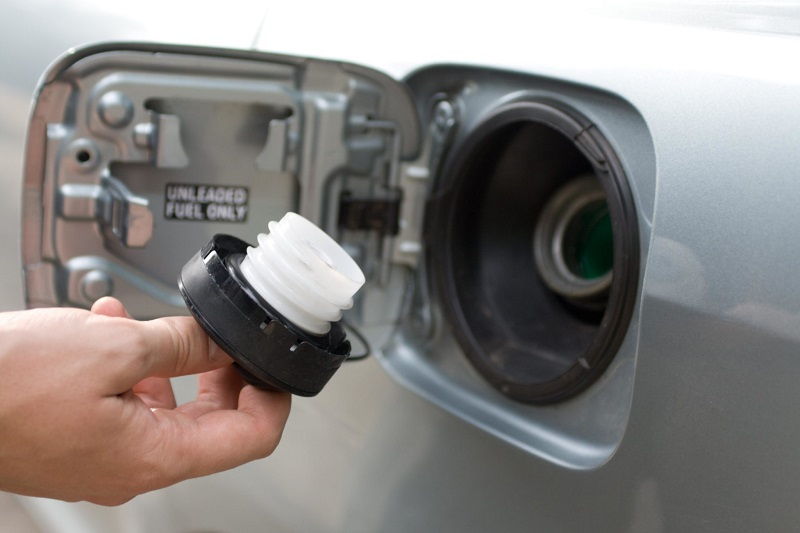
Loose or Faulty Gas Cap
A loose or faulty gas cap is one of the most common reasons for the check engine light to illuminate. The gas cap plays a crucial role in maintaining the fuel system’s pressure and preventing fuel evaporation. If the cap is loose, damaged, or missing, it can trigger the check engine light.
Faulty Oxygen Sensor
The oxygen sensor measures the amount of oxygen in the exhaust gases, helping the engine control module (ECM) adjust the air-fuel mixture.
A faulty oxygen sensor can cause inaccurate readings and affect your Kia’s fuel efficiency and emissions. This can trigger the check engine light.
Malfunctioning Mass Airflow Sensor
The mass airflow sensor measures the amount of air entering the engine, allowing the ECM to regulate fuel injection accordingly.
If the mass airflow sensor malfunctions or becomes dirty, it can cause incorrect air-fuel mixture readings, leading to engine performance issues and an illuminated check engine light.
Worn Spark Plugs or Ignition Coils
Spark plugs and ignition coils are vital components in the ignition system, responsible for igniting the air-fuel mixture in the combustion chamber.
Over time, spark plugs can wear out, and ignition coils can fail, resulting in misfires. This can trigger the check engine light and cause poor engine performance.
Faulty Catalytic Converter
The catalytic converter plays a crucial role in reducing harmful emissions by converting harmful gases into less harmful substances.
See Also: 2013 Kia Optima Battery: Jumpstarting Your Kia Optima
If the catalytic converter becomes damaged or fails, it can trigger the check engine light and potentially lead to increased emissions and reduced engine performance.
Diagnosing the KIA Check Engine Light
Diagnosing the cause of the check engine light requires a systematic approach. Here are some steps you can take to identify and address the issue:
Step 1: Check for Loose Gas Cap
Start by checking the gas cap to ensure it is tight and secure. If it’s loose, tighten it until you hear a clicking sound. If the gas cap is damaged or missing, consider replacing it.
Step 2: Use a Code Scanner
A code scanner is a helpful tool that allows you to retrieve diagnostic trouble codes (DTCs) from your Kia’s onboard computer.
Connect the code scanner to the OBD-II (On-Board Diagnostics) port, usually located under the dashboard. Retrieve the codes and refer to the scanner’s manual or online resources to interpret them.
Step 3: Interpret the Diagnostic Trouble Codes
Each diagnostic trouble code corresponds to a specific issue within your Kia’s engine system. Use the code scanner or online resources to interpret the codes. This will provide you with information about the potential problem, narrowing down your troubleshooting process.
Step 4: Research the Specific Codes
Once you have identified the diagnostic trouble codes, research each code individually to gain a deeper understanding of the underlying issue. Online resources, Kia forums, and repair manuals can provide valuable insights and potential solutions.
Step 5: Inspect Related Components
Based on the diagnostic trouble codes and research, inspect the components and systems related to the identified issue. This may involve visually checking wiring connections, sensors, or other components for damage or signs of malfunction.
Step 6: Consult a Professional if Needed
If you are unable to determine the cause of the check engine light or if the issue requires specialized knowledge or equipment, it is advisable to consult a certified technician or Kia dealership. They have the expertise and tools to diagnose and repair complex engine problems.
Potential Consequences of Ignoring the KIA Check Engine Light
Ignoring the check engine light can have various consequences, including:
Decreased Fuel Efficiency
When your Kia’s engine is not operating optimally, it may consume more fuel than necessary. Ignoring the check engine light can lead to decreased fuel efficiency, resulting in higher fuel costs over time.
Engine Damage
Unresolved engine issues can lead to more severe damage. Ignoring the check engine light may cause problems to worsen, potentially resulting in costly repairs or even the need for a new engine.
Increased Emissions
A malfunctioning engine can contribute to increased emissions, negatively impacting the environment. By addressing the check engine light promptly, you can help reduce your Kia’s carbon footprint and ensure it meets emissions standards.
Drivability Issues
Depending on the cause of the check engine light, you may experience drivability issues such as rough idling, hesitation, or reduced power. These issues can affect your overall driving experience and potentially compromise your safety on the road.
Temporary Solutions for the Kia Check Engine Light
If you’re unable to visit a mechanic immediately, here are some temporary solutions to consider:
Tighten the Gas Cap
If the check engine light is triggered by a loose gas cap, tighten it securely. This may resolve the issue, and the light should turn off after a few driving cycles.
Disconnect the Battery
Disconnecting the negative terminal of the battery for a few minutes can reset the vehicle’s onboard computer. This may temporarily clear the check engine light. However, keep in mind that disconnecting the battery can also reset other settings and may cause temporary issues with your Kia’s electrical systems.
Check for Obvious Issues
Inspect the engine bay for any obvious issues, such as disconnected or damaged hoses, loose wiring connections, or visible damage to components. If you identify a problem that you can address safely, such as reconnecting a loose hose, you may be able to resolve the issue temporarily.
Drive Conservatively
Adjust your driving style to be more conservative. Avoid aggressive acceleration or high-speed driving, as these actions can put additional strain on a potentially compromised engine system.
Costs Involved in KIA Check Engine Light Repairs
The costs associated with check engine light repairs can vary depending on several factors:
Severity of the Issue
The severity of the underlying issue can significantly impact the repair costs. Minor issues, such as a loose gas cap or a faulty sensor, may be relatively inexpensive to address. However, more complex problems, such as a failing catalytic converter or engine component, can be more costly to repair or replace.
Parts and Labor
The cost of parts and labor can vary depending on the specific repair required. Genuine Kiaparts may be more expensive than aftermarket alternatives, and labor costs can vary depending on the location and the expertise of the technician performing the repairs.
Warranty Coverage
If your Kia is still under warranty, certain repairs may be covered, reducing or eliminating the out-of-pocket costs. It’s important to check your warranty coverage and consult with your dealership or authorized service center to understand what repairs are included.
Diagnostic Fees
When visiting a professional technician or dealership to diagnose the check engine light, there may be diagnostic fees involved.
See Also: Kia Catalytic Converter Problems
These fees cover the time and resources required to identify the underlying issue. However, some repair shops may waive the diagnostic fees if you choose to have the repairs done at their facility.
Research and Compare Prices
Before committing to any repairs, it’s wise to research and compare prices from different repair shops or dealerships. Obtaining multiple quotes can help you find the most cost-effective solution without compromising quality.
Preventive Maintenance
Regular preventive maintenance can help minimize the occurrence of check engine light issues and potential repair costs. By following the recommended maintenance schedule outlined in your Kia’s owner’s manual, you can address minor issues before they escalate into more significant problems.
DIY Maintenance to Prevent KIA Check Engine Light Issues
Performing regular DIY maintenance can help prevent check engine light issues and keep your Kia running smoothly. Here are some essential maintenance tasks to consider:
Regular Oil Changes
Regularly changing your Kia’s engine oil is crucial for maintaining engine health. Oil lubricates the engine’s moving parts and helps dissipate heat. Over time, oil can become contaminated and lose its effectiveness. Follow the recommended oil change intervals specified in your owner’s manual to ensure optimal engine performance.
Check and Replace Air Filters
A clean air filter is essential for proper airflow into the engine. Over time, the air filter can become clogged with dirt, dust, and debris, restricting airflow and negatively impacting fuel efficiency and engine performance. Regularly inspect the air filter and replace it as needed.
Inspect and Maintain Spark Plugs
Spark plugs play a crucial role in igniting the air-fuel mixture in the combustion chamber. Over time, spark plugs can wear out or become fouled, leading to misfires and poor engine performance. Inspect the spark plugs regularly and replace them according to the manufacturer’s recommendations.
Monitor Fluid Levels
Regularly check and maintain proper fluid levels in your Kia, including engine coolant, brake fluid, transmission fluid, and power steering fluid. Low fluid levels can lead to engine overheating, brake malfunctions, or transmission issues, potentially triggering the check engine light.
Keep the Fuel System Clean
Using a fuel system cleaner periodically can help keep the fuel system clean and prevent carbon deposits from accumulating in the engine. This can improve fuel efficiency and reduce the risk of check engine light issues caused by fuel-related problems.
Address Minor Issues Promptly
If you notice any unusual sounds, vibrations, or smells coming from your Kia, address them promptly. Ignoring minor issues can lead to more significant problems and potential check engine light triggers. Consult your owner’s manual or seek professional advice if you are unsure about a particular issue.
How to Reset the Check Engine Light in a Kia
Once you have addressed the underlying issue that triggered the check engine light, you may need to reset the light. Here’s how you can reset the check engine light in your Kia:
Step 1: Ensure the Issue Is Resolved
Before resetting the check engine light, verify that the underlying issue has been properly addressed. This ensures that the light will not come back on immediately after resetting it.
Step 2: Disconnect the Negative Battery Cable
Locate the negative terminal of the battery, usually marked with a “-” symbol. Use a wrench or socket to loosen and disconnect the cable from the terminal. Leave it disconnected for a few minutes to allow the vehicle’s electrical systems to reset.
Step 3: Reconnect the Battery Cable
After a few minutes, reconnect the negative battery cable and tighten it securely. Ensure that the connection is firm to prevent any electrical issues or poor contact.
Step 4: Start the Engine
Start the engine and allow it to idle for a few minutes. This will allow the onboard computer to recalibrate and relearn the engine’s parameters.
See Also: Kia Stinger Blue: Performance Capabilities Of Kia Stinger
Step 5: Verify the Check Engine Light Is Off
Check the instrument cluster to confirm that the check engine light is no longer illuminated. If the light remains on, there may still be an unresolved issue, and further diagnosis or repairs may be necessary.
The Future of Kia Check Engine Light Technology
As automotive technology continues to advance, so does the check engine light technology. Here are some exciting possibilities for the future:
Enhanced Diagnostics
Future check engine light systems may provide more detailed diagnostic information, allowing for quicker and more accurate troubleshooting. This can help reduce diagnostic time and improve repair efficiency.
Real-Time Monitoring
Advanced check engine light systems may incorporate real-time monitoring of various engine parameters, providing immediate alerts and warnings for potential issues. This can help drivers take proactive measures to address problems before they escalate.
Mobile Integration
Integration with mobile devices and Kia’s proprietary apps may enable owners to access check engine light information remotely. This can provide convenience and peace of mind, allowing owners to stay informed about their vehicle’s health even when they are not behind the wheel.
Predictive Maintenance
Future check engine light systems may utilize advanced algorithms and machine learning to predict potential issues before they occur. By analyzing data from various sensors and components, the system can alert owners to upcoming maintenance needs, reducing the risk of unexpected breakdowns or costly repairs.
In conclusion, understanding the causes, diagnosing the issue, and finding appropriate solutions are crucial steps for dealing with the check engine light in your Kia.
By following the information outlined in this blog article, you’ll be well-equipped to address the problem effectively and ensure the optimal performance and longevity of your vehicle. Remember, timely action is key to avoiding further complications and costly repairs.
See Also: Kia Soul Alternator
Related video of Kia Check Engine Light: Causes, Diagnosis, and Solutions

- Food Trucks for Sale in Chicago IL - July 4, 2025
- Food Trucks for Sale in Florida by Owner - July 4, 2025
- Food Trucks for Sale in Las Vegas NV - July 4, 2025