
This post contains affiliate links. This means I will make a commission at no extra cost to you should you click through and make a purchase [ “As an Amazon Associate, I earn from qualifying purchases.” ]. Read the full disclosure here.
KIA Optima Alternator GuideMechanic.Com Are you experiencing issues with your Kia Optima’s alternator? Wondering what it does and how it affects your vehicle’s performance? Look no further! In this comprehensive guide, we’ll delve into the world of the Kia Optima alternator, providing you with all the information you need to know to understand, troubleshoot, and maintain this essential component of your vehicle.
Whether you’re a seasoned mechanic or a Kia Optima owner looking to educate yourself, this article will cover all the bases. From what an alternator is and how it works, to common signs of a failing alternator and steps to replace it, we’ve got you covered. So, let’s get started and explore the world of the Kia Optima alternator!
Signs of a Failing Alternator
A failing alternator can cause various issues in your Kia Optima. Recognizing the signs of a failing alternator is crucial to address the problem promptly and avoid further damage to your vehicle’s electrical system. Here are some common signs to watch out for:
1. Dimming Lights
One of the most apparent signs of a failing alternator is dimming headlights or interior lights. If you notice that your lights are not as bright as they used to be, especially when the engine is running at idle or at low speeds, it may indicate a lack of power supply from the alternator.
2. Strange Noises
A failing alternator can produce various unusual noises. You may hear grinding, whining, or squealing sounds coming from the engine compartment. These noises can be caused by worn-out bearings, a loose belt, or other mechanical issues within the alternator.
3. Battery Warning Light
If the battery warning light on your Kia Optima’s dashboard illuminates while the engine is running, it could be a sign of alternator trouble. This light indicates a problem with the charging system, and the alternator is a common culprit.
4. Electrical System Malfunctions
See Also: KIA Warning Lights Meaning
A failing alternator can cause various electrical system malfunctions. You may experience issues such as flickering lights, a malfunctioning radio or infotainment system, erratic power window operation, or a dead battery. These problems can be intermittent at first but may worsen over time.
5. Difficulty Starting the Engine
If your Kia Optima has difficulty starting, especially when the engine is warm, it may be due to a failing alternator. When the alternator fails to provide enough power to charge the battery, it can result in a weakened battery, leading to engine starting difficulties.
6. Stalling or Engine Misfires
A failing alternator can cause the engine to stall or misfire. As the alternator’s power supply becomes inconsistent, it may result in a lack of electrical power for the ignition system, causing the engine to stall or misfire.
7. Unresponsive Electrical Accessories
If your electrical accessories, such as power windows, power seats, or the air conditioning system, become unresponsive or operate erratically, it could be a sign of alternator trouble. These accessories rely on the alternator’s power supply to operate correctly.
8. Burning Smell
If you notice a burning smell coming from your engine compartment, it could be a sign of a failing alternator. Overheating within the alternator can cause electrical components to burn or melt, resulting in the unpleasant odor.
9. Warning Messages on the Dashboard
Modern Kia Optima models are equipped with advanced onboard computer systems that can detect issues with the alternator and other components. If you receive warning messages on your dashboard, such as “Check Charging System” or “Battery Low,” it’s essential to have your alternator inspected as soon as possible.
10. Battery Drainage
If you find that your Kia Optima’s battery is frequently draining, even after being fully charged, it may be due to a failing alternator. The alternator’s primary function is to recharge the battery while the engine is running, so a faulty alternator can result in an undercharged or weakened battery.
If you notice any of these signs, it’s crucial to have your Kia Optima’s alternator inspected and repaired or replaced if necessary. Ignoring alternator issues can lead to further electrical system damage and potentially leave you stranded with a non-starting vehicle.
Testing Your Alternator
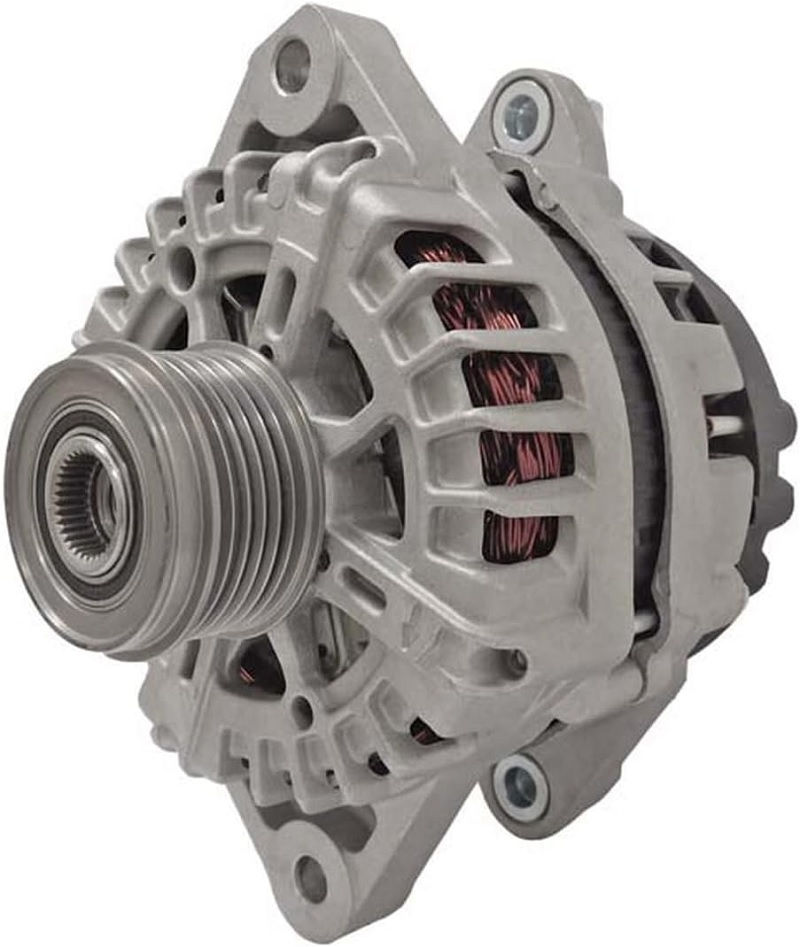
Check out this DB Electrical New Alternator Compatible with/Replacement for 2014-15 Kia Optima Ir/If; 12-Volt; 150 Amp, Fg15S110
If you suspect that your Kia Optima’s alternator is not functioning properly, it’s essential to perform some tests to diagnose the issue accurately. Here are several methods you can use to test your alternator’s performance:
1. Visual Inspection
Start by performing a visual inspection of your alternator. Check for any visible signs of damage or wear, such as loose connections, frayed wires, or excessive dirt or debris. Also, inspect the belts and pulleys connected to the alternator to ensure they are in good condition and properly tensioned.
2. Battery Voltage Test
One way to determine if your alternator is charging the battery correctly is by conducting a battery voltage test. With the engine off, use a multimeter to measure the voltage across the battery terminals.
A fully charged battery should read around 12.6 volts. Start the engine and recheck the voltage. If the voltage increases to around 13.8-14.4 volts, it indicates that the alternator is supplying power to the battery.
3. Load Test
A load test can help determine if your alternator can handle the electrical demands of your Kia Optima. Start by turning off all electrical accessories and starting the engine.
Let it idle for a few minutes to stabilize. Then, turn on various electrical components, such as the headlights, air conditioning, or radio, and observe the battery voltage.
If the voltage drops significantly below the recommended range, it may indicate an issue with the alternator’s capacity to handle the load.
4. Alternator Output Test
An alternator output test measures the actual output of the alternator. Connect a multimeter to the battery terminals and set it to the DC voltage scale. Start the engine and let it idle.
Then, have an assistant rev the engine to around 2000-2500 RPM while you monitorthe multimeter reading. A healthy alternator should output around 13.8-14.4 volts. If the reading is significantly lower or higher, it may indicate a problem with the alternator’s output.
5. Professional Testing
If you’re unsure about performing the tests yourself or want a more accurate diagnosis, it’s recommended to take your Kia Optima to a professional mechanic or an authorized Kia service center.
They have specialized equipment, such as an alternator tester, that can provide a comprehensive assessment of your alternator’s performance.
By conducting these tests, you can gain a better understanding of your Kia Optima’s alternator condition. However, remember that these tests are not foolproof, and it’s always best to consult a professional if you’re unsure about the results or need a more accurate diagnosis.
Alternator Replacement Steps
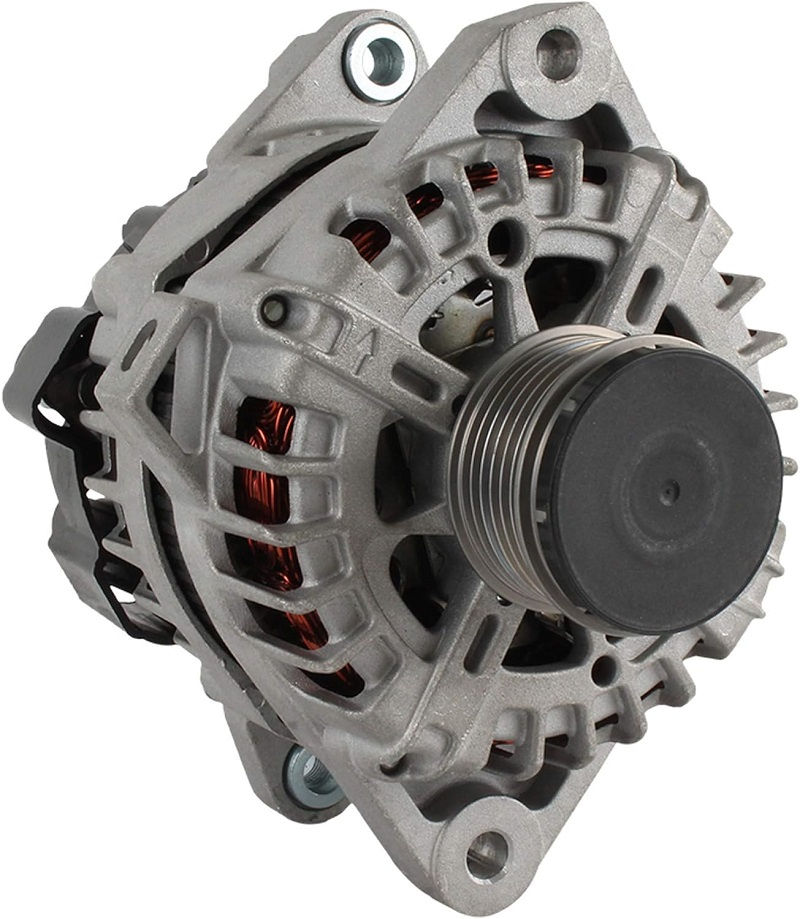
Check out this Alternator fits Kia Optima VIN C 8th digit (Certified Used Automotive Part) – Replaces 373002G150 | (Grade A)
If you’ve determined that your Kia Optima’s alternator needs to be replaced, it’s essential to follow the proper steps to ensure a successful replacement. Here’s a step-by-step guide to replacing your alternator:
1. Gather the Necessary Tools
Before starting the replacement process, gather all the necessary tools. You’ll typically need a socket set, a wrench set, pliers, a pry bar, a belt tensioner tool (if applicable), and a new alternator specifically designed for your Kia Optima model.
2. Disconnect the Battery
Prior to working on the electrical components, disconnect the negative terminal of the battery to prevent any accidental electrical shocks or damage.
3. Remove the Serpentine Belt
If your Kia Optima has a serpentine belt system, use a belt tensioner tool to relieve tension on the belt and remove it from the alternator pulley. If your vehicle has a separate alternator belt, loosen the adjustment bolt and remove the belt from the alternator pulley.
4. Disconnect Electrical Connections
Disconnect all electrical connections from the alternator. This may include the main power cable, electrical connectors, and any other wiring attached to the alternator.
5. Remove Mounting Bolts
Using a socket or wrench, remove the mounting bolts that secure the alternator to the engine. Depending on your Kia Optima model, there may be one or more bolts to remove. Carefully support the alternator as you remove the last bolt to prevent it from falling and causing damage.
6. Install the New Alternator
Position the new alternator in place and secure it with the mounting bolts. Tighten the bolts according to the manufacturer’s specifications. Reconnect all electrical connections, ensuring they are properly seated and secured.
7. Reinstall the Serpentine Belt
If you removed a serpentine belt, use a belt tensioner tool to relieve tension and reinstall the belt onto the alternator pulley. Make sure the belt is correctly aligned with all other pulleys in the system.
8. Reconnect the Battery
Once you’ve completed the installation, reconnect the negative terminal of the battery. Double-check that all connections are secure and tightened properly.
9. Test the New Alternator
Start the engine and let it idle to ensure the new alternator is functioning correctly. Use a multimeter to measure the voltage across the battery terminals. It should read around 13.8-14.4 volts, indicating that the alternator is charging the battery effectively.
If you’re uncomfortable performing the alternator replacement yourself, it’s recommended to seek the assistance of a professional mechanic or an authorized Kia service center.
See Also: KIA Check Engine Light
They have the expertise and experience to complete the replacement properly and ensure the optimal performance of your Kia Optima’s electrical system.
Maintaining Your Alternator
Proper maintenance is essential to ensure the longevity and optimal performance of your Kia Optima’s alternator. Here are some tips to keep your alternator in excellent condition:
1. Regular Inspections
Perform regular visual inspections of your alternator to check for any signs of wear, damage, or loose connections. Look for frayed wires, corroded terminals, or excessive dirt or debris that may impede the alternator’s performance.
2. Keep It Clean
Periodically clean your alternator to remove any dirt, grime, or debris that may accumulate on its surface. Use a soft cloth and a mild cleaning solution to wipe down the alternator, taking care not to damage any electrical connections.
3. Check Belt Tension
If your Kia Optima has a separate alternator belt, check its tension periodically. The belt should have the correct amount of tension to ensure proper power transmission. If it’s too loose or too tight, it can affect the alternator’s performance and lead to premature wear.
4. Maintain a Healthy Battery
A healthy battery is essential for the optimal performance of your alternator. Ensure that your battery is fully charged and in good condition. Regularly check the battery’s electrolyte levels (if applicable) and clean the terminals to prevent corrosion.
5. Avoid Overloading the Electrical System
Avoid overloading your Kia Optima’s electrical system by using electrical accessories excessively or simultaneously. Excessive electrical load can put strain on the alternator and other components, potentially leading to premature failure.
6. Address Electrical Issues Promptly
If you notice any electrical issues or signs of a failing alternator, address them promptly. Ignoring or delaying repairs can lead to further damage to the alternator and other electrical components, resulting in more extensive and costly repairs.
By following these maintenance tips, you can help extend the lifespan of your Kia Optima’s alternator and ensure the reliability of your vehicle’s electrical system.
The Importance of Genuine Kia Parts
When it comes to alternator replacements or any other automotive repairs, using genuine Kia parts is crucial for optimal performance and durability. Genuine Kia parts are specifically designed and manufactured to meet the highest quality standards set by Kia Motors. Here’s why it’s important to choose genuine Kia parts for your alternator:
1. Quality and Reliability
Genuine Kia parts are made from high-quality materials and undergo rigorous testing to ensure their reliability and longevity. By choosing genuine parts, you can have peace of mind knowing that they are designed to fit and function seamlessly with your Kia Optima’s alternator and electrical system.
2. Performance and Efficiency
Genuine Kia parts are engineered to deliver optimal performance and efficiency. They are designed to provide the correct voltage and power output required by your vehicle’s electrical system, ensuring that all components receive the necessary power without overloading the alternator.
3. Warranty Coverage
Using genuine Kia parts for your alternator replacement ensures that your vehicle maintains its warranty coverage. Genuine parts typically come with a warranty, providing you with added protection and peace of mind in case of any manufacturing defects or failures.
4. Compatibility and Fit
Genuine Kia parts are specifically designed to fit your Kia Optima model perfectly. They are manufactured to the exact specifications and dimensions required, ensuring a seamless installation and compatibility with other components in the electrical system.
5. Long-Term Cost Savings
While genuine Kia parts may have a slightly higher upfront cost compared to aftermarket alternatives, they offer long-term cost savings.
Genuine parts are built to last, reducing the risk of premature failure and the need for frequent replacements. This can save you money in the long run on repairs and maintenance.
When it comes to your Kia Optima’s alternator, choosing genuine Kia parts is the best way to ensure optimal performance, reliability, and longevity. Genuine parts provide the peace of mind and confidence that your vehicle’s electrical system is functioning at its best.
Tips for Extending the Life of Your Alternator
See Also: Kia Soul Alternator
To ensure the longevity of your Kia Optima’s alternator, here are some additional tips and advice:
1. Avoid Short Trips
Frequent short trips can put additional strain on the alternator as it may not have enough time to fully recharge the battery. Whenever possible, combine multiple errands into one trip to minimize the strain on the alternator.
2. Limit Electrical Load
Minimize the use of electrical accessories when the engine is not running. Excessive electrical load can drain the battery and put additional strain on the alternator when the engine is started.
3. Turn Off Accessories Before Turning Off the Engine
Prior to turning off the engine, ensure that all electrical accessories, such as lights, radio, and air conditioning, are turned off. This helps prevent a sudden surge of power demand when the engine is started again, reducing the strain on the alternator.
4. Avoid Jump-Starting Other Vehicles
Jump-starting other vehicles can put significant strain on your Kia Optima’s alternator. If possible, avoid jump-starting other vehicles with your own to preserve the health and performance of your alternator.
5. Maintain Proper Belt Tension
If your Kia Optima has a separate alternator belt, ensure that it is properly tensioned. An overly loose or tight belt can cause excessive strain on the alternator, leading to premature wear and potential failure.
6. Keep Your Battery in Good Condition
A healthy battery is essential for the optimal performance of your alternator. Regularly check the battery’s electrolyte levels, if applicable, and ensure the terminals are clean and free from corrosion. Replace the battery when necessary to prevent any strain on the alternator due to a weakened battery.
7. Regularly Inspect and Clean Electrical Connections
Inspect the electrical connections related to the alternator, including the wiring and connectors, for any signs of damage or corrosion. Clean the connections as needed and ensure they are securely fastened to prevent any electrical issues.
8. Schedule Regular Maintenance
Follow the recommended maintenance schedule for your Kia Optima, including regular inspections and servicing. This ensures that all components, including the alternator, are properly maintained and any potential issues are addressed before they escalate.
By following these tips, you can help extend the life of your Kia Optima’s alternator and maintain the optimal performance of your vehicle’s electrical system.
The Cost of Alternator Replacement
The cost of replacing an alternator in a Kia Optima can vary depending on several factors, including the model year, location, and whether you choose a genuine Kia part or an aftermarket alternative. Here’s a breakdown of the average cost:
1. Genuine Kia Alternator
If you opt for a genuine Kia alternator, the cost can range from $400 to $600 on average. This price includes the alternator itself, as well as the labor cost for installation.
2. Aftermarket Alternator
Choosing an aftermarket alternator can offer a more affordable option. Aftermarket alternators typically cost between $200 and $400, depending on the brand and quality. The labor cost for installation may be similar to that of a genuine Kia alternator.
3. Additional Costs
In addition to the alternator and labor costs, there may be additional expenses involved in the alternator replacement process. These can include the cost of any necessary belts, pulleys, or other components that need to be replaced along with the alternator.
4. Professional Installation
While some experienced individuals may choose to replace the alternator themselves, it’s recommended to have the replacement done by a professional mechanic or an authorized Kia service center. They have the expertise and knowledge to ensure a proper installation, minimizing the risk of damage to other components or improper functioning of the alternator.
5. Warranty Considerations
When replacing the alternator, it’s important to consider any warranty coverage that may apply. If your Kia Optima is still under warranty, using a genuine Kia alternator and having the replacement done by an authorized Kia service center can help preserve your warranty coverage.
Keep in mind that these cost ranges are approximate and can vary based on several factors. It’s recommended to obtain quotes from reputable mechanics or service centers in your area to get a more accurate estimate for your specific Kia Optima model and location.

- Small Food Trucks for Sale - July 6, 2025
- Turnkey Food Trucks for Sale in California - July 6, 2025
- Mobile Food Trucks for Sale in Texas - July 6, 2025