

This post contains affiliate links. This means I will make a commission at no extra cost to you should you click through and make a purchase [ “As an Amazon Associate, I earn from qualifying purchases.” ]. Read the full disclosure here.
Spark Plug Cap Replacement GuideMechanic.Com When it comes to maintaining an efficient and well-functioning engine, spark plug cap replacement is a crucial task that should never be overlooked.
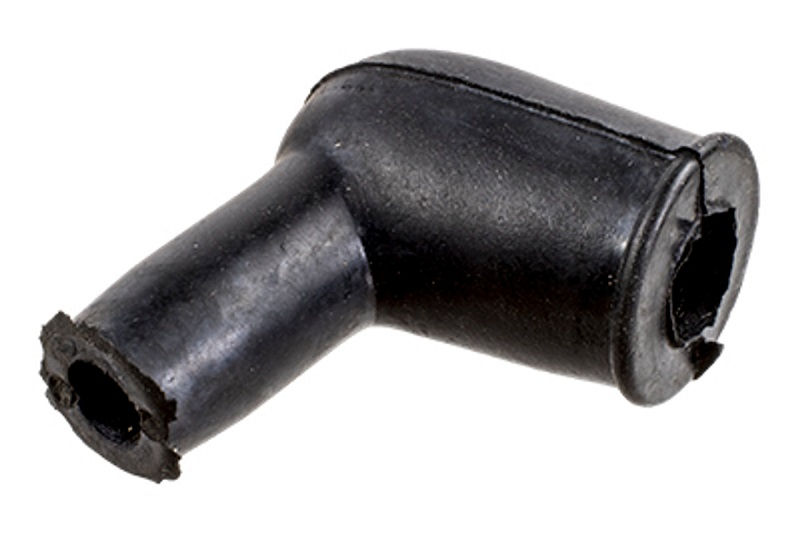
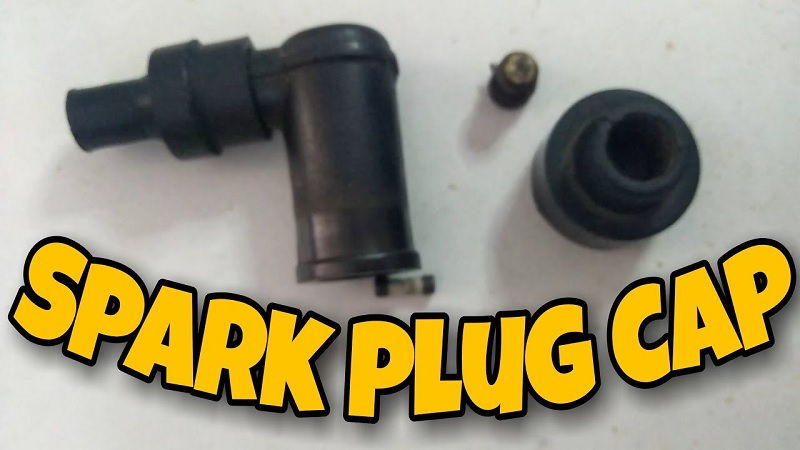
The spark plug cap, also known as the ignition coil boot, plays a vital role in delivering the spark from the ignition coil to the spark plug.
Over time, this component can wear out or become damaged, resulting in issues such as misfires, poor fuel efficiency, and even engine damage.
In this comprehensive guide, we will delve into the intricacies of spark plug cap replacement, providing you with all the information you need to tackle this important task.
From understanding the signs that indicate a faulty spark plug cap to step-by-step instructions on how to replace it, we’ve got you covered. So, let’s dive in and ensure your engine’s ignition system is in top-notch condition!
Understanding the Importance of Spark Plug Caps
Spark plug caps are often overlooked components of the ignition system, but their importance cannot be overstated.
These small connectors play a crucial role in delivering the electrical charge from the ignition coil to the spark plug, igniting the air-fuel mixture in the combustion chamber. Without a functioning spark plug cap, the engine’s performance can suffer significantly.
How Spark Plug Caps Function
Spark plug caps are designed to provide a secure connection between the ignition coil and the spark plug.
See Also: 2011 Chevy Cruze Spark Plugs
They consist of a conductive core, typically made of copper or another conductive material, surrounded by a protective insulator.
When the ignition coil sends an electrical charge to the spark plug, the spark plug cap ensures that the charge reaches the spark plug without any loss or interference.
The Role of Spark Plug Caps in the Ignition Process
During the ignition process, the spark plug cap acts as a bridge between the ignition coil and the spark plug.
As the electrical charge travels through the ignition coil, it reaches the spark plug cap, which then delivers the charge to the spark plug’s center electrode.
This electrical charge creates a spark that ignites the air-fuel mixture, leading to combustion and the subsequent power stroke in the engine.
The Consequences of Neglecting Spark Plug Cap Maintenance
Over time, spark plug caps can deteriorate due to various factors such as heat, vibration, and exposure to contaminants.
When a spark plug cap becomes worn or damaged, it can lead to a range of issues that negatively impact engine performance.
Ignoring spark plug cap maintenance can result in misfires, reduced fuel efficiency, rough idling, engine stalling, and even long-term damage to the engine.
Recognizing Signs of a Faulty Spark Plug Cap
Identifying the signs that indicate a faulty spark plug cap is crucial for timely replacement and preventing further engine problems.
By paying attention to these symptoms, you can address the issue promptly and restore your engine’s performance.
Engine Misfires
One of the most common signs of a faulty spark plug cap is engine misfires. Misfires occur when the spark plug cap fails to deliver the electrical charge consistently, resulting in incomplete combustion in one or more cylinders.
This can lead to a rough-running engine, loss of power, and even damage to the catalytic converter if left unaddressed.
Rough Idling
A faulty spark plug cap can also cause rough idling, where the engine runs unevenly or experiences fluctuations in RPM while at idle.
This can manifest as vibrations, a shaky engine, or a noticeable change in exhaust tone. If you notice these symptoms, it’s important to inspect the spark plug cap and replace it if necessary.
Reduced Fuel Efficiency
A deteriorating spark plug cap can result in reduced fuel efficiency. When the spark plug cap fails to deliver a strong and consistent spark to ignite the air-fuel mixture, the engine may burn fuel inefficiently, leading to decreased mileage and increased fuel consumption. Monitoring your vehicle’s fuel efficiency can help you identify potential spark plug cap issues.
Engine Stalling
In severe cases, a faulty spark plug cap can cause the engine to stall. If the spark plug cap fails to deliver the necessary spark to ignite the air-fuel mixture, the engine may shut off abruptly while driving or idling. Engine stalling poses a safety risk, so it’s crucial to address this issue immediately.
Difficulty Starting the Engine
Another sign of a faulty spark plug cap is difficulty starting the engine. If the spark plug cap is worn or damaged, it may not provide the necessary spark to initiate combustion, resulting in prolonged cranking or failure to start. Pay attention to any changes in your vehicle’s starting behavior, as it may indicate a spark plug cap problem.
Gathering the Necessary Tools and Materials
Before embarking on the spark plug cap replacement process, it’s important to gather all the necessary tools and materials. Having everything at hand will ensure a smooth and efficient replacement procedure.
See Also: 2009 Honda Accord Spark Plugs
Tools Required for Spark Plug Cap Replacement
Here are some essential tools you’ll need for spark plug cap replacement:
- A socket wrench with the appropriate socket size for removing the spark plug cap
- A spark plug socket or deep socket for removing the spark plug (may vary depending on your vehicle)
- A spark plug gap gauge to check and adjust the spark plug gap if necessary
- A wire brush or spark plug cleaner to clean the spark plug electrodes
- Dielectric grease to apply on the spark plug cap and ignition coil boot for improved conductivity and protection against moisture
- A torque wrench for properly tightening the spark plug and spark plug cap
- Safety glasses and gloves to protect yourself during the replacement process
Materials Required for Spark Plug Cap Replacement
Make sure you have the following materials before starting the spark plug cap replacement:
- A new spark plug cap that matches the specifications of your vehicle’s ignition system
- A new spark plug (optional but recommended for a complete ignition system refresh)
- A clean cloth or rag for wiping any dirt or debris
- Isopropyl alcohol or a similar cleaning solution for cleaning the spark plug area
Locating the Spark Plug Cap
Knowing the exact location of the spark plug cap is essential for a successful replacement. While the location can vary depending on your vehicle’s make and model, the spark plug cap is typically found on top of the engine, near the spark plugs.
Locating the Spark Plug Cap in a Front-Engine Vehicle
In most front-engine vehicles, the spark plug cap can be found on the engine’s cylinder head. To locate it, follow these steps:
- Open the hood of your vehicle and secure it with the prop rod or hood stand.
- Locate the engine, which is usually positioned in the front of the vehicle.
- Identify the spark plug wires connected to the top of the engine.
- Follow the spark plug wires towards the engine’s cylinder head. The wires will lead you to the spark plug caps.
Locating the Spark Plug Cap in a Rear-Engine Vehicle
For rear-engine vehicles, the spark plug cap’s location may vary depending on the engine’s configuration. Here’s a general guideline:
- Access the rear engine compartment of your vehicle. This may involve removing access panels or covers.
- Locate the spark plug wires that connect to the rear of the engine.
- Follow the spark plug wires towards the engine’s cylinder heads. The wires will lead you to the spark plug caps.
Locating the Spark Plug Cap in a Motorcycle or Small Engine
Motorcycles and small engines have different configurations, but the spark plug cap is typically located in a similar manner. Here’s how to find it:
- Ensure the motorcycle or small engine is turned off and cooled down.
- Locate the engine, which is usually positioned towards the front or center of the vehicle.
- Identify the spark plug wires connected to the top of the engine.
- Follow the spark plug wires towards the engine’s cylinder head. The wires will lead you to the spark plug caps.
Removing the Old Spark Plug Cap
Replacing the spark plug cap requires removing the old one first. By following these step-by-step instructions, you can safely and effectively remove the worn-out spark plug cap without causing any damage to your engine or ignition system.
Step 1: Prepare the Work Area
Before starting the removal process, ensure that the engine is cool to the touch, as working on a hot engine can lead to burns. Additionally, make sure you are working in a well-ventilated area to avoid inhaling any fumes.
Step 2: Disconnect the Battery (if Required)
In some vehicles, it may be necessary to disconnect thebattery before performing any electrical work. This step ensures your safety and prevents any accidental sparks or electrical shocks. Refer to your vehicle’s manual to determine if battery disconnection is necessary and follow the recommended procedure.
Step 3: Locate the Spark Plug Cap
Using the previously mentioned techniques, locate the spark plug cap on your specific vehicle. Take note of its position and how it is connected to the ignition coil and spark plug wire.
Step 4: Remove the Spark Plug Wire
Gently grip the spark plug wire at the boot or connector that attaches to the spark plug cap. While holding the wire, twist it slightly to break any seal or bond that may have formed over time.
Then, carefully pull the wire away from the spark plug cap. Avoid yanking or pulling forcefully, as this can damage the wire or the cap itself.
Step 5: Inspect the Spark Plug Wire
With the spark plug wire disconnected, inspect its condition for any signs of damage or wear. Look for cracks, fraying, or signs of burning on the wire insulation. If you notice any significant damage, it may be necessary to replace the spark plug wire along with the cap.
Step 6: Remove the Old Spark Plug Cap
Once the spark plug wire is disconnected, you can proceed to remove the old spark plug cap. Depending on the design of the cap, it may be threaded onto the ignition coil or simply plugged into place. Follow these instructions based on the type of attachment:
Threaded Spark Plug Cap:
- Using a socket wrench with the appropriate socket size, carefully loosen and remove the threaded spark plug cap from the ignition coil. Turn it counterclockwise to unscrew it from the coil.
- Once the cap is loose, continue unscrewing it by hand until it is completely removed from the ignition coil. Take note of any washers or seals that may be present and keep them for the installation of the new spark plug cap.
Push-On Spark Plug Cap:
- Gently grip the base of the spark plug cap, where it connects to the ignition coil.
- While holding the cap, twist it counterclockwise or wiggle it back and forth to loosen it from the ignition coil. Apply steady and gentle pressure until the cap detaches from the coil.
Step 7: Inspect the Old Spark Plug Cap
Once the old spark plug cap is removed, take a moment to inspect its condition. Look for signs of wear, corrosion, or damage to the conductive core, insulator, or any other components. If the cap shows any significant signs of wear or damage, it is recommended to replace it with a new one.
Step 8: Clean the Spark Plug Area
With the old spark plug cap removed, take the opportunity to clean the spark plug area. Use a clean cloth or rag to wipe away any dirt, debris, or oil that may have accumulated.
See Also: 2010 Mazda 3 Spark Plugs
You can also use isopropyl alcohol or a similar cleaning solution to ensure a clean and contamination-free surface for the new spark plug cap installation.
Inspecting the Ignition Coil Boot
Once the old spark plug cap is removed, it’s essential to inspect the ignition coil boot for any signs of damage or wear. The ignition coil boot is the rubber or silicone sleeve that connects the spark plug wire to the ignition coil.
Inspecting the Outer Surface
Begin by examining the outer surface of the ignition coil boot. Look for any cracks, tears, or visible damage that could compromise its integrity.
Pay close attention to the areas where the boot connects to the spark plug wire and the ignition coil, as these are common points of wear and vulnerability.
Checking the Inside of the Ignition Coil Boot
Carefully remove the ignition coil boot from the spark plug wire and inspect the inside of the boot. Look for signs of corrosion, carbon buildup, or damage to the conductive metal core.
These issues can hinder the transfer of the electrical charge and affect the overall performance of the ignition system.
Replacing the Ignition Coil Boot (if necessary)
If you notice any significant damage or wear during the inspection, it is advisable to replace the ignition coil boot along with the spark plug cap.
A worn or damaged boot can lead to poor electrical conductivity and may cause similar issues as a faulty spark plug cap. Make sure to purchase a boot that is compatible with your vehicle’s ignition system.
Choosing the Right Replacement Spark Plug Cap
With a wide variety of spark plug caps available on the market, selecting the right one can seem overwhelming. However, by considering a few key factors, you can make an informed decision and choose the perfect replacement spark plug cap for your vehicle.
Consult Your Vehicle’s Manual
The first step in choosing the right spark plug cap is to consult your vehicle’s manual or documentation. The manufacturer’s specifications will provide valuable information regarding the required spark plug cap type, size, and compatibility with your specific engine and ignition system. These details ensure that you select a cap that meets the necessary electrical and physical requirements.
Consider the Material and Design
Spark plug caps come in various materials and designs, each with its own advantages and considerations.
The most common materials used for spark plug caps include brass, copper, and silicone. Brass and copper caps offer excellent conductivity and durability, while silicone caps provide enhanced resistance to heat and moisture. Consider your vehicle’s operating conditions and choose a material that suits your needs.
Check the Resistance Rating
Spark plug caps have a resistance rating that affects the electrical conductivity and performance of the ignition system. The resistance rating is typically measured in ohms and can vary between different spark plug caps.
Consult your vehicle’s manual or a trusted automotive professional to determine the recommended resistance rating for your specific engine and ignition system. Choosing a spark plug cap with the correct resistance ensures optimal performance and compatibility.
Verify the Connector Type
Spark plug caps come in different connector types, such as threaded, push-on, or snap-on. It is crucial to choose a replacement cap that matches the connector type of your ignition coil and spark plug wire.
See Also: RCJ7Y Cross Reference
Mismatched connectors may not provide a secure and reliable connection, leading to electrical issues and potential damage to the ignition system. Pay close attention to the connector design and ensure compatibility.
Consider Brand Reputation and Quality
When selecting a replacement spark plug cap, it is advisable to choose a reputable brand known for producing high-quality automotive components.
Research customer reviews and ratings to gauge the reliability and performance of different brands. Investing in a trusted brand ensures that you receive a durable and reliable spark plug cap that will stand the test of time.
Installing the New Spark Plug Cap
Now that you have the perfect replacement spark plug cap, it’s time to install it correctly. Follow these step-by-step instructions to ensure a smooth and successful installation process:
Step 1: Prepare the Work Area
Before installing the new spark plug cap, ensure that the engine is cool to the touch and the work area is clean and free from any debris or contaminants.
This will help prevent any foreign particles from entering the ignition system or causing damage during the installation.
Step 2: Apply Dielectric Grease
Using dielectric grease can enhance the performance and longevity of the spark plug cap by improving electrical conductivity and protecting against moisture.
Apply a small amount of dielectric grease to the inside of the spark plug cap’s boot or connector. Spread the grease evenly to ensure full coverage.
Step 3: Insert the Spark Plug Cap
Carefully insert the new spark plug cap onto the ignition coil or spark plug wire, depending on the type of connector. Ensure that it fits securely and makes a tight connection.
For threaded caps, thread it clockwise onto the ignition coil until it is snug. For push-on or snap-on caps, push it firmly until you hear or feel it click into place.
Step 4: Tighten the Spark Plug Cap
If you’re dealing with a threaded spark plug cap, use a socket wrench with the appropriate socket size to tighten it. Avoid overtightening, as this can damage the cap or the ignition coil.
Refer to your vehicle’s manual for the recommended torque specifications and use a torque wrench if necessary. For push-on or snap-on caps, ensure they are securely seated and fully engaged.
Step 5: Reconnect the Spark Plug Wire
With the spark plug cap successfully installed, it’s time to reconnect the spark plug wire. Align the spark plug wire’s connector with the spark plug cap’s boot or connector and push it firmly until it clicks into place. Give the wire a gentle tug to ensure it is securely attached.
Testing the Ignition System
Once the new spark plug cap is in place, it’s crucial to test the ignition system to ensure everything is functioning as it should.
Performing a thorough ignition system test will help you verify the effectiveness of the replacement and guarantee optimal engine performance.
Step 1: Reconnect theSpark Plug Wire
Double-check that the spark plug wire is securely connected to the spark plug cap. Ensure that it is properly seated and fully engaged to prevent any potential misfires or electrical issues.
Step 2: Reconnect the Battery (if Disconnected)
If you had disconnected the battery earlier in the process, now is the time to reconnect it. Follow the recommended procedure outlined in your vehicle’s manual to ensure proper reconnection and avoid any electrical hazards.
Step 3: Start the Engine
Crank the engine and start your vehicle. Observe the engine’s behavior and listen for any abnormal sounds. The engine should start smoothly and idle without any roughness or misfires.
If you notice any issues or unusual behavior, it may indicate a problem with the spark plug cap installation or another aspect of the ignition system.
Step 4: Check for Engine Performance
Take your vehicle for a test drive to assess its performance. Pay attention to acceleration, throttle response, and overall engine smoothness.
If the spark plug cap replacement was successful, you should experience improved engine performance, smoother operation, and better fuel efficiency.
Step 5: Monitor for Potential Issues
After the spark plug cap replacement and test drive, continue monitoring your vehicle for any signs of recurring issues. Keep an eye out for engine misfires, rough idling, reduced fuel efficiency, or any other symptoms that may indicate a problem with the ignition system.
If you notice any concerns, it’s advisable to consult a qualified mechanic for further inspection and diagnosis.
Maintenance Tips for Prolonged Spark Plug Cap Life
To ensure the prolonged life and optimal performance of your spark plug cap, it’s important to implement a regular maintenance routine.
By following these maintenance tips, you can keep your spark plug cap in top-notch condition and prevent future issues:
Regularly Inspect the Spark Plug Cap
Periodically inspect the spark plug cap for any signs of wear, damage, or corrosion. Check the connectors, the conductive core, and the insulator for any issues. If you notice any significant damage or deterioration, consider replacing the spark plug cap to prevent potential problems.
Keep the Spark Plug Area Clean
Maintain a clean and debris-free environment around the spark plug cap and spark plug area. Regularly wipe away any dirt, grease, or oil using a clean cloth or rag. This helps prevent contaminants from interfering with the spark plug cap’s performance or causing electrical issues.
Replace Spark Plug Wires as Needed
Spark plug wires play a crucial role in delivering the electrical charge from the ignition coil to the spark plug.
See Also: Troy Bilt Spark Plug Size
If you notice any signs of wear, cracking, or damage to the spark plug wires during inspections, it may be necessary to replace them. Damaged wires can compromise the performance of the spark plug cap and the overall ignition system.
Apply Dielectric Grease During Replacements
When replacing the spark plug cap or spark plug wires, apply a small amount of dielectric grease to the inside of the boot or connector.
This helps improve electrical conductivity and provides a protective barrier against moisture and contaminants. Ensure that the grease is evenly spread to ensure full coverage.
Perform Regular Ignition System Checks
Include regular checks of your vehicle’s ignition system as part of your maintenance routine. This includes inspecting the ignition coil, spark plugs, and other components for any signs of wear or damage.
Keeping the entire ignition system in good condition contributes to the proper functioning of the spark plug cap.
Follow Manufacturer’s Recommendations
Always refer to your vehicle’s manual or the manufacturer’s recommendations for specific maintenance intervals and procedures.
Different vehicles and ignition systems may have varying requirements, so it’s important to follow the guidelines provided by the manufacturer to ensure optimal performance and longevity of the spark plug cap.
In conclusion, spark plug cap replacement is a vital aspect of engine maintenance that should not be overlooked.
By understanding the importance of spark plug caps, recognizing signs of a faulty cap, and following the step-by-step instructions for replacement, you can ensure optimal engine performance.
Remember to gather the necessary tools and materials, locate the spark plug cap, and inspect the ignition coil boot before choosing and installing the right replacement.
Finally, test the ignition system and implement proper maintenance practices for prolonged spark plug cap life.
With this comprehensive guide, you’ll be equipped with the knowledge to tackle spark plug cap replacement with confidence.
Related video of Spark Plug Cap Replacement: A Comprehensive Guide for Optimal Engine Performance

- Cheap Car Insurance Quotes with Low Rates Today - April 15, 2026
- Cheap Car Insurance Quotes No Personal Info - April 14, 2026
- Unlocking Affordable Auto Insurance: Your Expert Guide to Cheap Car Insurance Quotes (No Personal Info, Monthly Payments) - April 13, 2026